If you are in Boston and want good Italian food, you head to the North End. If you are in the North End and want good pizza, you head to Regina. Which is exactly what my daughter and I did yesterday and it was so good! We lucked out because we were able to walk right in and get a table which is pretty much unheard of. There is usually quite a line stretched out along the sidewalk and the reason we don’t go more often than we do.
The North End is filled with restaurants and if you were to walk into any one of them lining Hanover or Salem Streets I’m sure you would not be disappointed. However, tucked away by itself on Thatcher Street is where you really need to go if you want great pizza.
Regina Pizzeria is one of the oldest pizza restaurants in Boston, if not the oldest? They have been serving up these delicious pies in this location since 1926. It is no frills and in no way fancy, and very possible it hasn’t been updated since 1926. For me, that is another reason I always head to the original location even though their newer locations are easier to get to. Depending on which table you sit in and what time of year it is, you may need to be careful not to lean on the hissing radiator abutting your table.
They only make and serve pizza and they do it right. No salads, nothing except pizza.
I hardly ever eat the crust on pizza, but I eat every bite of the crust of Regina pizza. It has to be one of the best crusts I have ever had.
The next time you are in Boston craving pizza, head to the best. Actually, maybe you shouldn’t so I won’t have to wait too long to get a table 😜
For years I have been chocolate dipping Oreos around the holidays, but they never looked professional. I would use tongs and dip them in the melted chocolate and remove the excess chocolate by tapping the tongs on the edge of the bowl. They looked nice, and of course tasted delicious, but never looked like the ones I had seen in stores and I always just chalked it up to the fact that I wasn’t a professional candy maker.
Well, one day not too long ago I had an “ah ha” moment and realized there must be a mold to make these professional looking Oreos, and sure enough there was. I purchased an inexpensive set of silicone molds on-line and they are one of the best purchases I have made. I’m not sure if you are like me, but I get very excited about things like this. A simple silicone mold and a little patience can get your Oreos to look like you are a professional, or pretty close to it.
They make perfect gifts, and anyone that receives them will surely be impressed. There are so many different colors and flavors of melting wafers available that you can be as creative as you want. I made batches for Halloween,
and even for birthdays.
I even got a little creative this Christmas and made little snow scenes on the Oreos.
Here’s how to get these Oreos looking so pretty:
I put the molds on a cookie sheet even though I did not photograph it that way, it makes it easier to move the molds.
Once you have melted your chocolate, put about a tablespoon full in each mold. Tap the cookie sheet repeatedly on your counter or table to spread the chocolate and to get rid of some of the air bubbles.
I was doing this one day while my husband was in the next room on a business call and his client asked if he was in a gold mine, it can get quite loud.
Top the melted chocolate with the Oreos, and fill with additional melted chocolate. Once again tap the cookie sheet so the air bubbles come up and the mold fills completely with the chocolate.
This will often cause the Oreos to pop up a little. I use a toothpick to push them back down, then a few more counter taps with the cookie sheet and they should look great.
Let them cool in the refrigerator before removing from the molds.
Once cool you can drizzle melted chocolate on them to decorate. Beautiful and delicious!
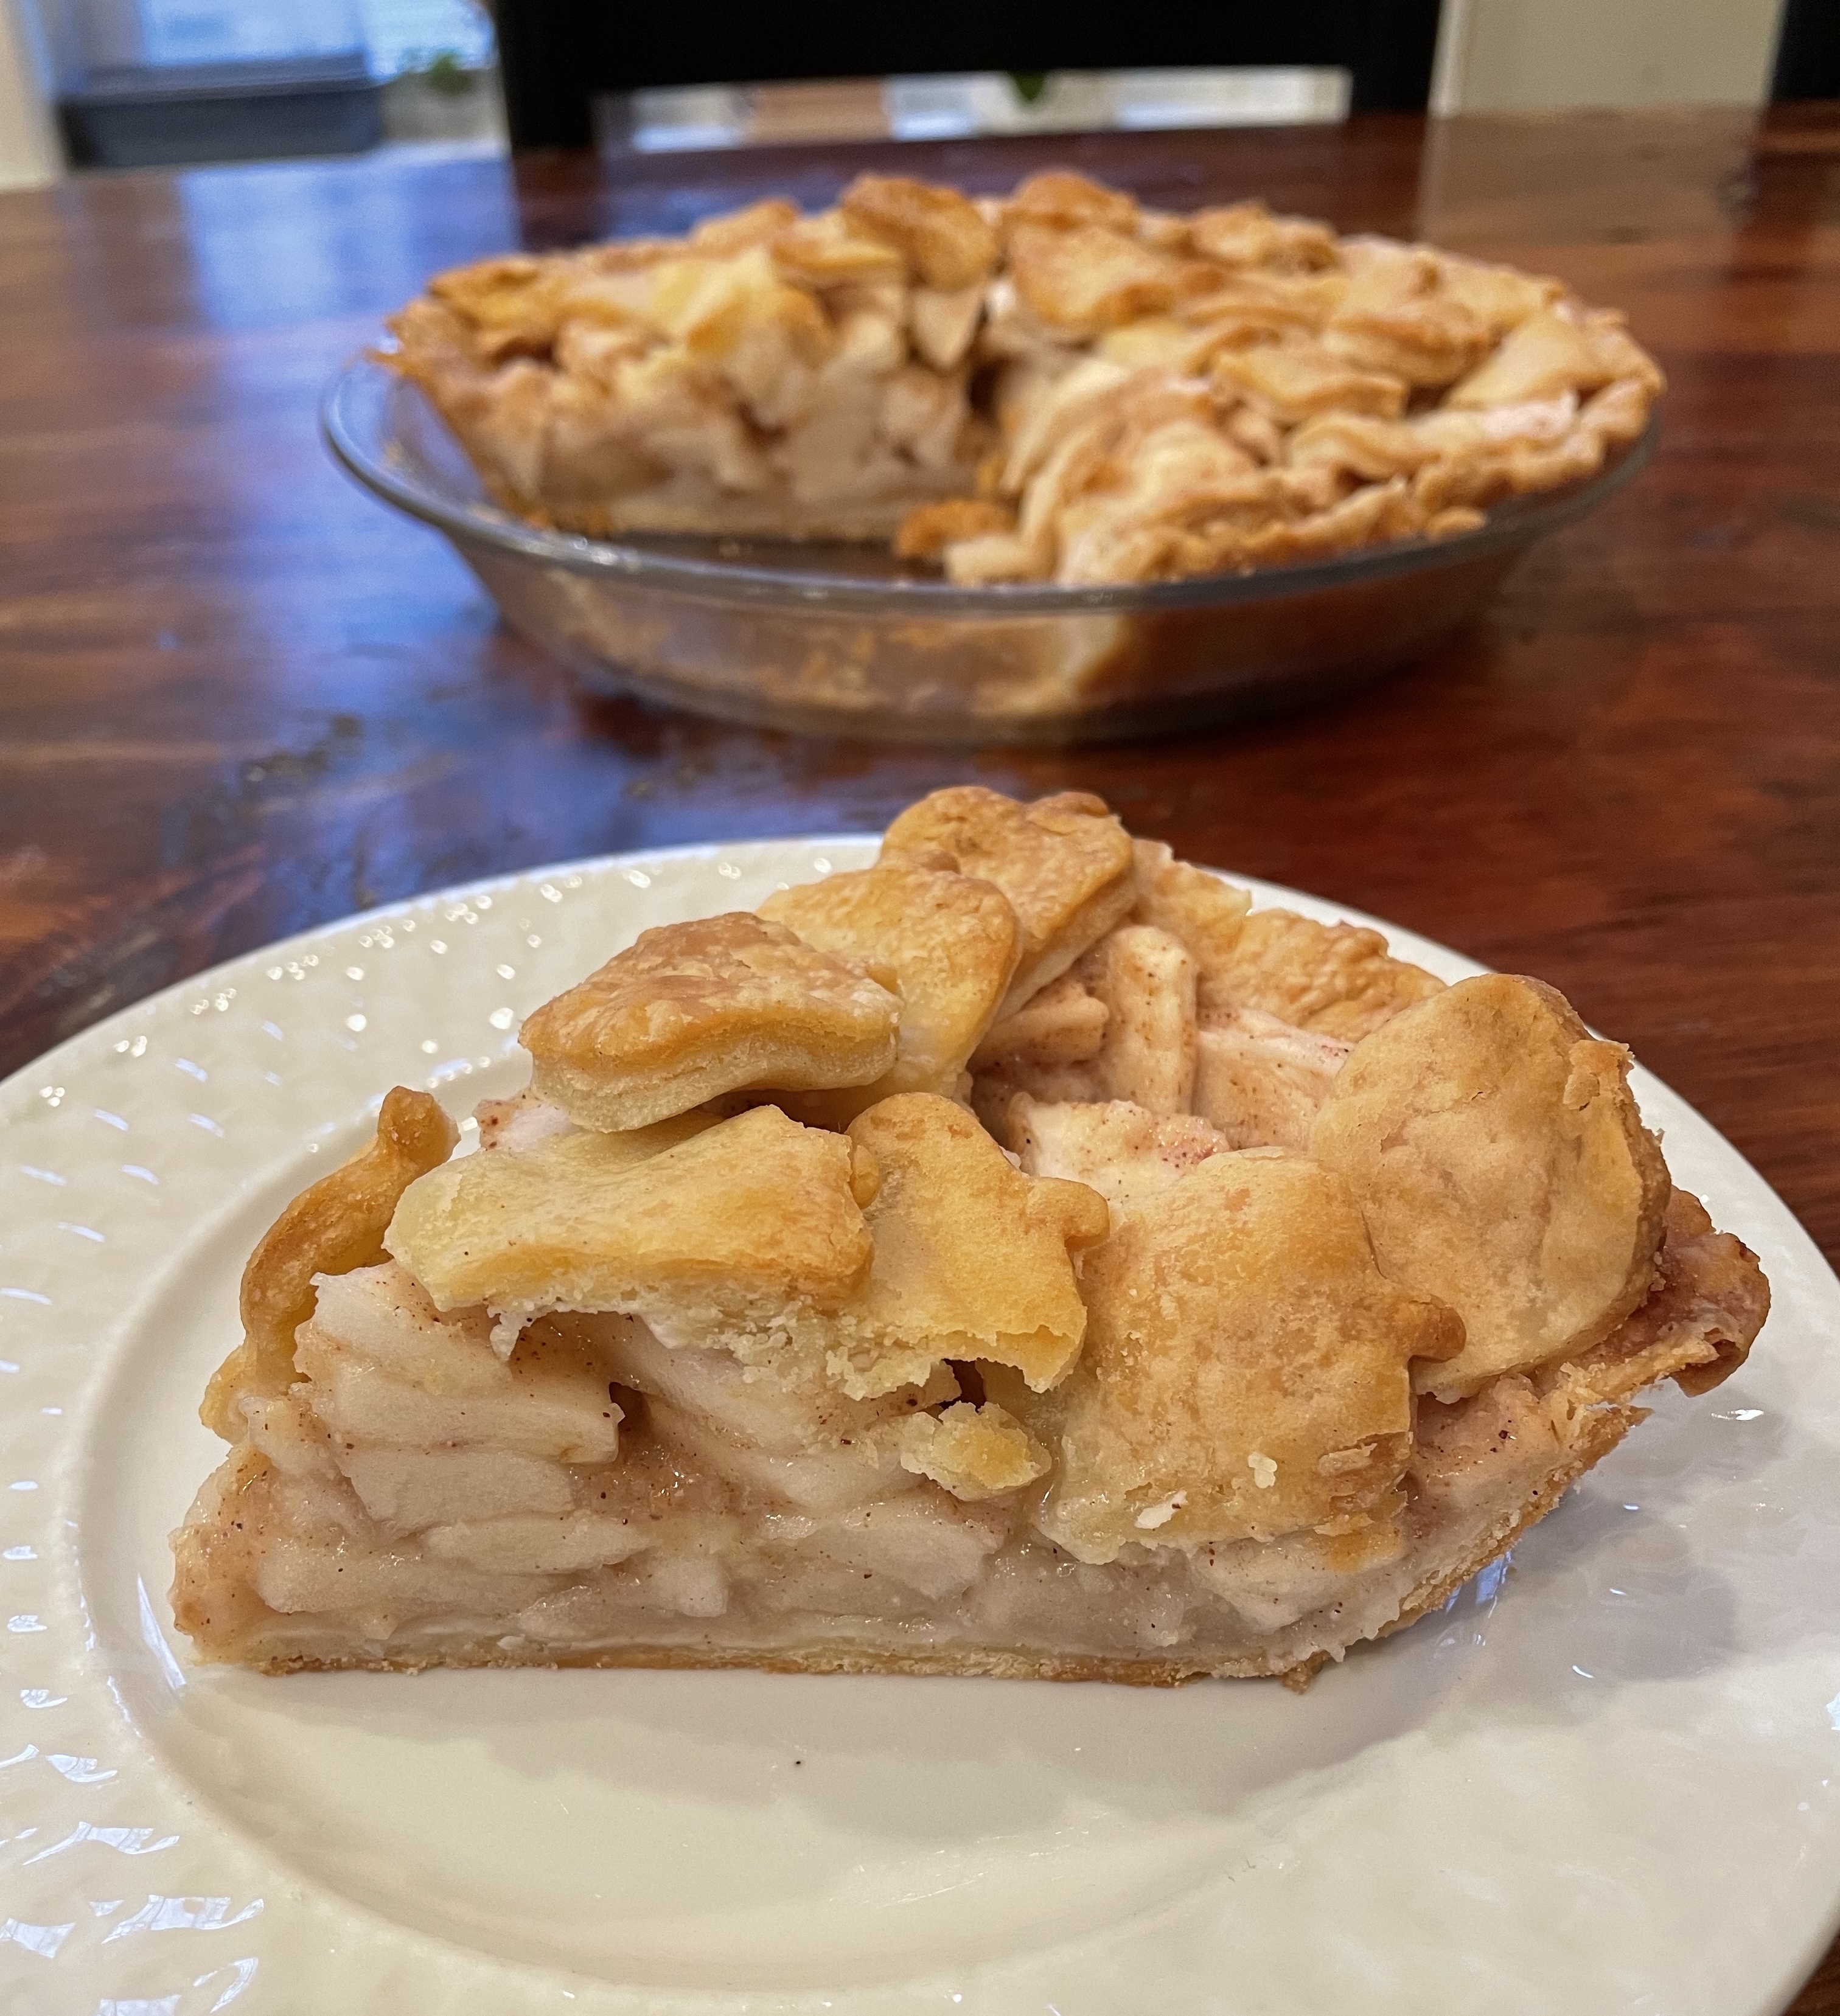
The smell of a homemade apple pie not only fills your home with a wonderful aroma, but it fills your soul with warmth. It makes any house feel like home, and brings back memories of childhood. There’s an old saying about baking an apple pie right before an open house as it will make the house feel like home to new buyers. While this is a pie I typically only bake in the Fall, I decided apple pie was the perfect way to ring in the New Year.
The thing I like best about apple pie is that you can pretty much justify it as a serving of fruit, right? 😜
The recipe I have always used comes out of my Betty Crocker cookbook, as do so many of my tried and true recipes. If it ain’t broke, don’t fix it.
Ingredients:
Two-crust pie crust
1/3 – 2/3 cup sugar
1/4 cup flour
1/2 tsp cinnamon
1/2 tsp nutmeg
Dash of salt
2 tbsp. butter
8 medium Cortland or Macintosh apples
Prepare a two crust pie crust. You can find the recipe I use here:
Line your pie plate with half of the rolled out dough.
Heat oven to 425 degrees.
In a large mixing bowl combine the sugar, flour, cinnamon, nutmeg, and salt. Set aside. The apples I used were quite large so I used 2/3 cup sugar. If you have smaller apples you may want to use the smaller amount of sugar.
Peel and core the apples. Slice into thin pieces and add to the mixing bowl. Combine well.
Spoon the apple mixture into the pie plate. Please don’t judge me for my horrible crimped edges, I’m not sure what was going on, but I just couldn’t make them pretty this time. Hopefully I made up for it with the pretty top crust.
Dot the top of the apples with the butter.
Now it is time to top the pie with the remaining half of rolled out crust. I chose to get a little creative by cutting out shapes of apples. You can do something like this or top the pie with the solid rolled out crust. If you use the solid crust make sure to seal the edges, and add a few slits in the top. You could also cut long strips of dough and weave them on top to make a lattice top. No matter how you top it, it will be delicious!
Bake for 40-50 minutes or until crust is brown and the juices are bubbling up through the top. You may want to cover the edges of the crust with aluminum foil to prevent excessive browning. If you do this, remove the foil during the last 15 minutes of baking.
My entire crust was browning quickly so I topped the whole pie with foil for part of the baking time.
You can eat it cold, warm, with ice cream, or plain, and it will still be yummy! Enjoy!
Prepare two-crust pie crust. Line a pie plate with half of the rolled out dough.
Heat oven to 425 degrees.
In a large mixing bowl combine sugar, flour, cinnamon, nutmeg, and salt.
Peel, core, and slice apples. Add to mixing bowl and combine well.
Spoon apple mixture into prepared pie crust. Dot with butter.
Top with remaining crust. If using a solid crust top, seal edges and add slits to top.
Bake for 40-50 minutes or until crust is brown and juices are bubbling up through the top. You may want to cover edges with aluminum foil to prevent excessive browning. If so, remove for the last 15 minutes of baking.
Recently I was at a restaurant and they offered a PB & J cocktail on their menu, and I gave it a try. I think their drink had red wine and maybe some actual jelly in it, and it was delicious. The amazing part to this drink was the peanut butter whiskey. Yup, whiskey. I am not a whiskey drinker, but this whiskey is like no other whiskey I have cringed taking a sip of before. It is so smooth and tastes like you are drinking melted peanut butter. To me it tastes more like a liqueur, and I believe the alcohol content is less than a typical whiskey. Kudos to Skrewball Whiskey for coming up with such a delicious and unique product!
I didn’t really want to figure out how to combine the ingredients used in the restaurant so I decided to give Chambord a try, which I already had in my house. If you aren’t familiar with Chambord, it is a raspberry flavored liqueur.
I used a 2 to 1 ratio and poured 1 oz of Chambord over ice and topped it with 2 ounces of the whiskey. It was perfect, and like no other drink I have ever tried. And the lyrics “peanut butter jelly time, peanut butter jelly time”, was on repeat in my head the entire time I was making it.
If you like peanut butter and jelly, this cocktail is a must try. Trust me.
I can’t wait to play around with this whiskey and some chocolate liqueur!
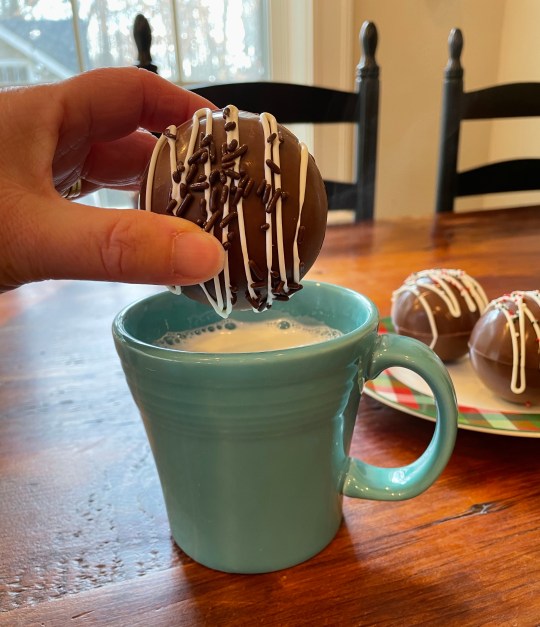
If you aren’t familiar with a cocoa bomb, they are a hollow chocolate shell filled with marshmallows and hot cocoa mix. These bombs of chocolate yumminess make a fun gift for anyone. All you have to do is put them in a mug of hot milk and violá, hot chocolate!
They definitely took a couple of tries before I was able to get the hang of them though. I had read a few tips on-line, but it took some trial and error until I figured out what worked best. Now that I have worked out the kinks it should be easier for you.
To make cocoa bombs you need:
Silicone mold
Pastry brush
Melting chocolate
Hot cocoa mix
Mini marshmallows
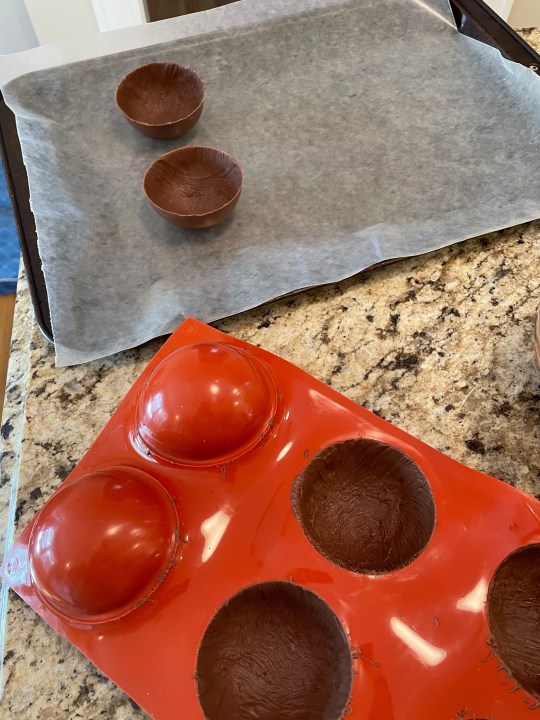
Melt the chocolate as directed on the package. I chose to use chocolate melting wafers, but you could also use other kinds of chocolate.
Once the chocolate is melted, spoon a little of the chocolate into each mold and spread with the pastry brush. Be sure to cover the entire mold. You may need to dip the brush into the chocolate a few times to make sure the mold is evenly covered.
Refrigerate for 5 minutes, then add another coat of chocolate to the mold. Refrigerate for another 5 minutes.
Once set the chocolate can be removed from the molds. Be careful as the chocolate can crack.
Now it’s time to fill them with the marshmallows and cocoa, and you are probably thinking how might one do that?
I had read a few different ways to get the molds to stick together, but they didn’t really work. You might come up with a better way than mine.
I chose to get some water boiling in a small saucepan and cover with a small plate.
I took one half and rubbed it on the warm plate just for a few seconds so the edge started to melt.
I then filled that half with some marshmallows and 1 tbsp of cocoa mix. I did the same with the top half and placed the two sides together. Hold them together for a few seconds until they stick.
I chose to drizzle some melted white chocolate and top with Jimmies and Holiday sprinkles. You can be as creative as you want with these as there are so many options for variations with flavors and chocolates. Have fun with them!
Once they are done they are ready to make into hot cocoa. All you need to do is heat up about 8 oz. of milk, pour it into a mug, add the cocoa bomb and stir.
Nothing screams vintage cookbook like flambe right? In keeping with my “Steph and Betty” goal of trying as many recipes as I can from my mother’s old Betty Crocker cookbook, I decided to light some peaches on fire today. It took a few tries as Betty didn’t really explain how to get the brandy to actually light. But that is what I am here for!
I’ll be honest, the idea of sticking a flame into a pan with the goal of starting a fire, scared me. A lot. But, I went ahead and did it anyway.
Ingredients:
1/4 cup apricot jam
3 tbsp sugar
1/2 cup water
4 large peaches, peeled and sliced, or 1 large 29 oz. can of sliced peaches, drained
1 tsp lemon juice
1/4 cup brandy
Combine the jam, sugar, and water in a saucepan. Simmer over low heat about 5 minutes or until syrupy. I couldn’t find jam so had to settle on preserves which I think may have been the reason it did not get very syrupy.
Add the peaches to the pan and heat for about 3 minutes for fresh peaches until almost tender, and less for canned peaches. Add lemon juice and stir.
In order for the brandy to light it needs to be hot. The original recipe just said to heat the brandy but did not explain that the brandy needs to heat until it starts to bubble. It will not light if not hot enough.
Once this happens turn off the heat under the peaches, make sure to do this.
Pour the hot brandy over the peaches and light.
Once it burns out, stir and serve over vanilla ice cream. It was actually quite yummy!
Combine jam, sugar, and water in a saucepan for about 5 minutes until syrupy. Add peaches and cook 3 minutes for fresh peaches, or less for canned peaches until heated. Stir in lemon juice.
Heat brandy in small saucepan until it starts to bubble.
Remove both from heat. Pour hot brandy over peaches and light.
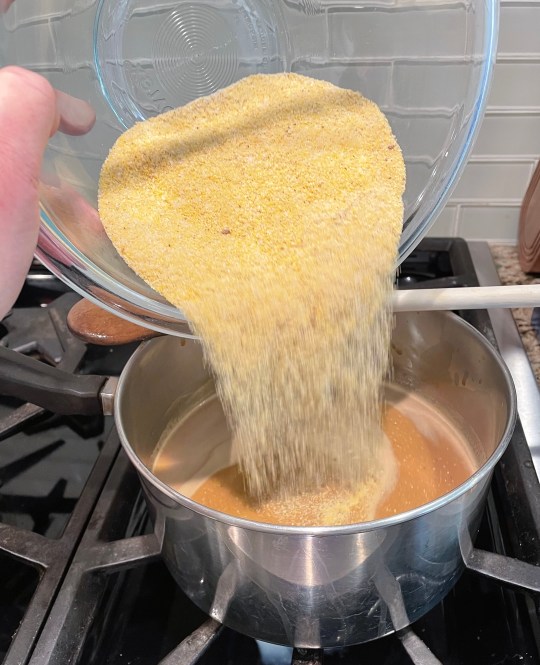
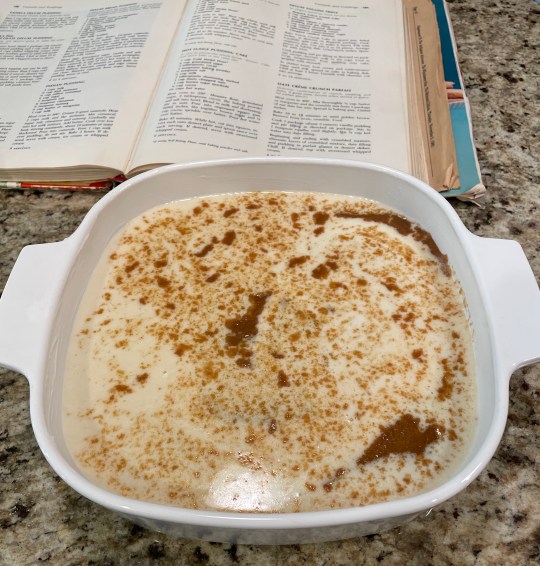
I had never heard of Indian Pudding until I flipped through the pages of my mother’s Betty Crocker cookbook. I was in the pudding section as I was making Rice Pudding, and happened upon this. It was intriguing and even as it was in the oven, for 3 hours I must add, I still had no idea what to expect. Cornmeal and molasses, hmmm. Come to find out it tasted like brown bread, which was interesting.
I’m not entirely sure this recipe actually worked, but since I am determined to make as many recipes as I can from my mom’s old cookbook I decided to write the blog anyway. Steph and Betty!
As I mentioned the recipe called for a 3 hour baking time. However, it did not mention how to know if the pudding was done. After the 3 hours I thought how could it not be done, right? Well, I’m not really sure it actually was done as it was not set in the center even after sitting for an hour. If I ever am to make this again I would let it cook longer until the pudding seemed set. It did set in the refrigerator and was much better the next day. The only I picture I took was the night of, however, and you can see how loose it was.
Ingredients:
4 cups of milk
2/3 cup molasses
2/3 cup yellow cornmeal
1/3 cup sugar
1 tsp salt
3/4 tsp cinnamon
3/4 tsp nutmeg
1/4 cup butter
Heat oven to 300 degrees. Grease a 2 quart casserole dish.
In a saucepan combine 3 cups of the milk and molasses and heat over low/medium heat.
In a small mixing bowl combine cornmeal, sugar, salt, cinnamon, and nutmeg.
Gradually stir into hot milk mixture. Add butter.
Cook over low heat, stirring constantly, for about 10 minutes until thickened.
It didn’t seem like it was going to thicken, but it did.
Pour into the casserole.
Pour the remaining 1 cup of milk on top of pudding; do not stir. Bake for 3 hours or until set.
Serve warm with vanilla ice cream or whipped cream.
Today as I was flipping through the pages of my mother’s Betty Crocker cookbook, I came upon an easy no bake recipe for Chocolate Clusters. Since I happened to have the ingredients in the house, I gave it a try. Delicious! They are little clusters of fudgy yummy. These will definitely be making it into my Holiday baking this year.
Ingredients:
6 oz. semi-sweet chocolate
1/2 cup butter
16 large marshmallows
1/2 tsp. vanilla
1 cup shredded coconut
2 cups oats
In a large saucepan combine the chocolate, butter, and marshmallows.
Cook over low heat while stirring frequently until the mixture is melted and smooth.
Remove from heat and stir in the vanilla. Add the coconut and oats and combine well.
Drop by teasponfuls onto a cookie sheet lined with wax paper. I used a cookie scoop.
In a large saucepan combine chocolate, butter, and marshmallows. Cook over low heat until everything is melted and smooth. Remove from heat and stir in vanilla.
Add coconut and oats and combine well.
Drop by teasponfuls onto wax paper lined cookie sheet. Refrigerate until set.
Rice pudding brings back so many childhood memories for me. My mother used Betty Crocker’s recipe and years ago when I was searching on-line for that recipe I thought I had found it, but I was wrong. When my mom passed away and I got her Betty Crocker cookbook I realized it was not the same.
I decided to try the recipe in my mom’s cookbook and see which I preferred. While they are both delicious, they are actually quite different. This recipe creates a thick custard on top of the pudding and since I happen to love custard, I think I might prefer this version. This recipe is from the book my mother received as a wedding gift in 1969.
Ingredients:
1/2 cup rice
1 cup water (or less if using instant rice)
3 eggs, slightly beaten
1/2 cup sugar
2 tsp. vanilla
1/4 tsp. salt
2 1/2 cups scalded milk (see below)
1/2 cup raisins
Cinnamon
Heat oven to 350 degrees.
Cook rice as instructed. The original recipe calls for instant rice, but I cooked regular rice.
Slightly beat eggs in a large mixing bowl. Whisk in sugar, vanilla, and salt.
Gradually add scalded milk to egg mixture.
** How to scald milk – heat milk in a pan until it reaches 170 degrees. You do not want the milk to boil, it should just get to the point where a film forms on the top. Remove milk from heat and let it cool to 110 degrees before continuing recipe.
Stir in rice and raisins.
Pour into an ungreased 1 1/2 quart casserole, sprinkle with cinnamon.
Place the casserole in a pan and pour in very hot water until about 1 1/4 inches deep.
Bake about 70 minutes or until knife inserted halfway between center and edge comes out clean. Remove the casserole from the pan of water.
Serve either warm or cool, personally I prefer it cool. Keep refrigerated.
Look at that yummy custard and creamy pudding. So good!
One of the best things about quiche is its versatility. Not only with the endless varieties that can be created, but it is perfect for brunch, lunch, or dinner. I decided to use broccoli, spinach, and tomatoes in this quiche, but you can use just about anything you want. While the egg mixture remains the same, the vegetables or meat can vary.
The other great thing about this recipe is that it doesn’t have to be crustless. You can add any pie crust to this recipe if you would like, or bake without the crust for a lower calorie healthier alternative as I did with this recipe.
Ingredients:
1 tbsp. olive oil
1 cup brocolli florets
1 -2 cups fresh spinach
1/3 cup grape tomatoes, halved
1-2 tsp. of minced garlic
6 eggs
2/3 cup milk
1/3 cup half and half
1/2 tsp. pepper
1/2 tsp. salt
1/4 cup cheddar cheese
1/4 cup feta cheese
Preheat oven to 350 degrees. Grease a pie plate with cooking spray.
Heat the olive oil in a frying pan over medium heat. Add the broccoli and saute for a minute or two before adding the spinach, tomatoes, and garlic. Saute until the spinach is cooked.
Spread the vegetables evenly in the prepared pie plate. Top with cheeses. You can use whatever kind of cheese you prefer. I was hoping for cheddar and feta, but only had a shredded Mexican blend and feta in the house so I used those.
Whisk together the eggs, milk, half and half, salt, and pepper. Ladle evenly over the vegetable and cheese.
Bake for approximately 30 minutes or until set. Allow to cool for 10-15 minutes before serving. Enjoy!