Whenever I find myself at an estate sale, auction, or yard sale, I am always on the look out for some unique old piece to repurpose into something useful. The old saying is very true, “One man’s trash is another man’s treasure”. Well, woman’s in this case. I love unique old pieces not only because it allows you to decorate unlike someone else, but it re-uses something that might otherwise have ended up in the trash. While I wrote this blog to offer some suggestions, there are no rules, you can do whatever you like! Well, I did see a toilet repurposed into a planter on a front lawn once and I think that is where I would draw the line. Don’t do that, please.
My parents dragging me to antique flea markets as a child definitely rubbed off on me. What started out as collecting marbles so I wouldn’t complain on our Sunday outings, turned into a passion for all things old. You will see my childhood marble collection in one of the photos below.
In this blog you will see some ideas of easy to find items perfect to help your rustic repurposing. Before scrolling ahead, let me disclose that these photos were taken over the years with whatever cell phone I had at the time. These are all my photos, and they were not taken just for this blog so please excuse the quality of some of them.
ANTIQUE RACKS –
Even though I have written about antique racks in a separate blog, I am going to touch on them again. Antique industrial wooden racks are not the cheapest of items to repurpose, but in my opinion they are definitely worth it. Most often referred to as cobbler’s racks or shoe racks, they were originally used to dry or transport shoes. These wooden beauties have become a very popular decorative piece for many years. I personally have been using them for around 25 years.
One of my favorites is gorgeous cobbler’s rack that proudly holds my wine and vintage sailboat glasses in our house in Maine. The other rack I used had flat shelves, and spent many years in my kitchen displaying antique mixing bowls, then found a new home in our finished basement holding bins of craft supplies for my children, and eventually became a display piece in my shop.
Here is my repurposed wine rack.

Aren’t those sailboat glasses great? They were all purchased at thrift shops, which gives me more money for wine 😉

Here is an example of a cobbler’s rack with flat shelves. Once again not the best photo as it was taken quickly years ago, but you get the idea.

HARDWARE AND PRINTER’S DRAWERS –
Letterpress, or printer’s drawers were used to hold movable type used in letterpress printing. They were stored in a cabinet, and because of the popularity of the drawers by themselves it is often difficult to find the cabinets complete. Most people hang the drawers on the wall for items to be seen, and therefore have no need to hide their goods away. However, I have sold cabinets to artists and jewelers that use them as organizational storage for their supplies.
While most people use them as a fun way to display shells, figurines, or what have you, some people use them practically as well. I had a customer that sewed and wanted some to hang over her sewing machine to hold all her threads. What a perfect idea! I have also seen them used in stores showcasing jewelry.
As a child I had an antique printers drawer on my wall where I proudly displayed all of my little miniature animals and rocks. I now have one hung up in my house in Maine proudly displaying some of my favorite sea glass pieces my family has found.
Here is a photo of an almost complete cabinet I had for sale a number of years ago to give an idea of what they look like, as well as some large hardware drawers.

I’m pretty sure the next cabinet may have been the cause of my husband’s hernia surgeries. It was the largest I have ever seen.

Because of its size I ended up selling most of the drawers individually. Look how cool they are?

Letterpress drawers can be found in many different sizes to meet the needs of whatever it is you are looking to display or organize. Here are some examples of some I have had over the years.

The most common letterpress drawers were made by Hamilton, as seen below.

While not as common, you will often find drawers made by Ludlow, seen below.

Hardware drawers are exactly what they sound like, drawers used in tool cabinets to hold hardware. Anytime I was fortunate enough to find any kind of unique old drawers they would sell right away. Here is one I kept and used for some succulents, until I killed them. Despite being one of the easiest plants to have, I never have any luck with them. I did get a number of compliments while they were alive, however.

I also use some different hardware drawers in my home office for my shipping labels and other various office supplies. I’m embarrassed to say my office is a little too messy to show any photos, you’ll have to trust me that they look really good.
WOODEN BOXES AND CRATES –
I can’t even guess at how many times I have gotten filthy digging through basements, attics, barns, and garages for old wooden boxes. Small, big, plain, advertising, whatever. I have repurposed them in so many different ways over the years. Then I re-repurpose them, is re-repurpose even a word? Even if it isn’t a word, it is definitely a thing.
I currently have an advertising crate from Cambridge, Ma in my family room holding magazines, while sitting on top of an antique wooden trunk.

Recently I was looking for a place to store some random cookbooks, etc. After a quick trip out to my shed I found a solution by stacking a few old beer crates in my sunroom. And there is my old marble collection!

Crates are also great for holding record albums, which many people use them for including my daughter. I love that she too loves repurposing old things.
I keep one on my side porch on a bench and I rotate flowers in the spring and summer, mums in the fall, and holiday greens in the winter.
The smaller wooden hardware boxes and drawers are perfect for seasonal and holiday decorating inside as well. I have a variety in my stash of boxes that take turns on my kitchen island holding spring flowers, or holiday greens.

I was recently looking for a new napkin holder, and instead of buying new I decided to repurpose an old cheese box instead. The only thing that makes boxes any better for me, is when they are from Boston.

Here are some examples of the many, many different kinds you can find, and just some of the ones that I have had over the years.


CARD CATALOGS –
Long ago before the internet, remember having to use card catalogs to find the book you needed in a library? Those beautiful cabinets have now lended themselves into the repurposing world, albeit not cheaply.
I am kicking myself for not keeping some of the ones I have come across over the years. I did keep one that I use in my home office to hold bill stubs and bank statements, but I wish I had a larger one. Maybe some day.
There are so many uses for these fantastic old cabinets. This large cabinet would have made a perfect wine cabinet, don’t you think? Maybe it did!


I really do love these, sigh. Here are a few others that I have had over the years to show some of the different styles available.


They are all such beautiful, and heavy, pieces of furniture!
WOODEN LADDERS –
There was a time when I was known in the local antique circle as the “Ladder Lady”, as I was always in possession of wooden ladders perfect for repurposing into blanket or towel racks. I use some in my bathrooms to hold guest hand towels, and I have one in my family room displaying a tablecloth made by my great-grandmother. Before I received the tablecloth a number of years ago, it had been hidden away in a drawer by my grandmother, and then by my mother. I love that a simple repurposed rustic item can show off this amazing piece.

Antique stores are flooded with old wooden ladders these days, and they are very easy to find. The prices have come down considerably as well. If you ever find one you like but it is too tall, just cut it down. Back in my “ladder lady” days, most of the ladders I found were often large 12′ ladders that I would cut into two 6′ ladders as there aren’t too many homes that can accommodate such tall pieces.
Tall ladders aren’t the only kind great for repurposing. A few years ago I found a few of these fantastic library ladders, at where else, but a library sale. They would have been perfect as a unique plant rack, and a shop owner bought some for displaying pieces in her store. You’ve probably been in a number of stores that use the folding ladders as display pieces.

ANTIQUE JARS –
Let’s talk about antique jars. I don’t want to say I’m obsessed with them, but I am. And I hoard them. I have loads of them, and buy them anytime I see them for a good deal. I have quite a stash of mason jars, apothecary jars, candy jars from general stores, and many others. I use them for so many different things, and even though I could never possibly use them all, you never know!
I root plant clippings in them on my kitchen windowsill;

I use them for displaying some of my favorite shells I have found (smaller is a Necco candy jar, and the larger is an apothecary jar);

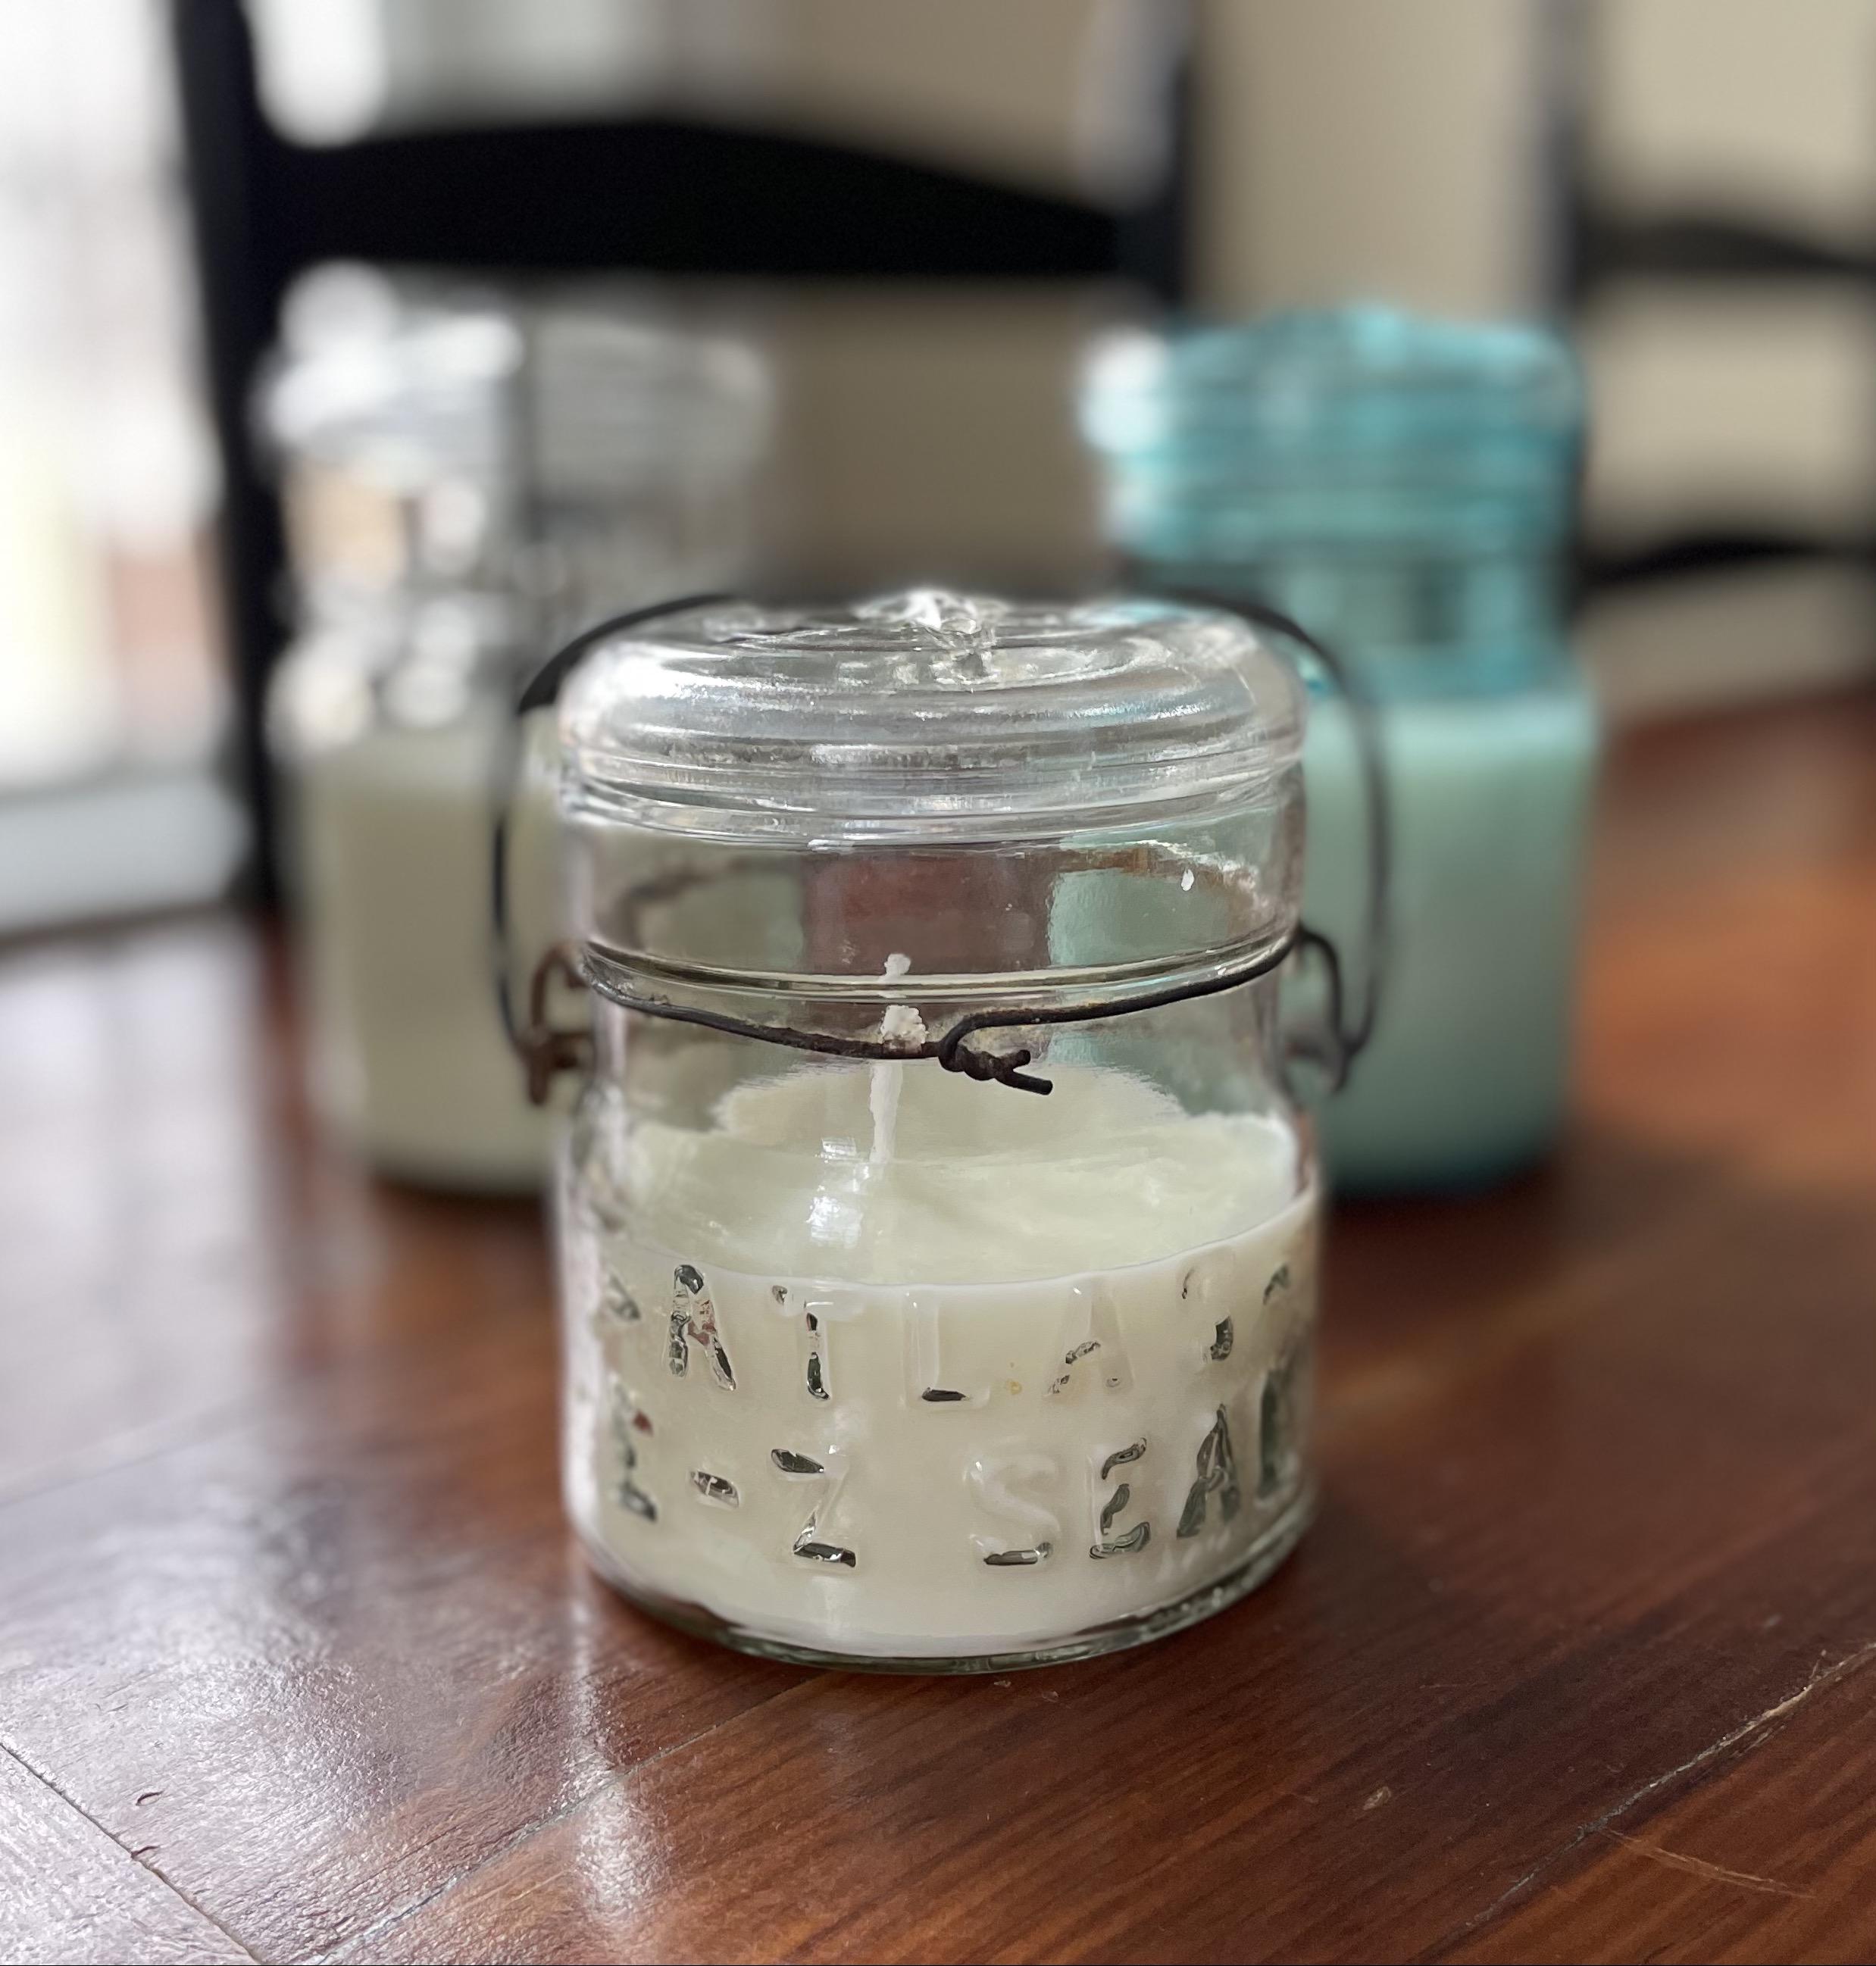
I’ve made candles and snow globes in them;


and I use this incredible old jar from a laboratory to display some of the sea glass I have found, even though I don’t really want to think about what the original use of this jar may have been;

and I also have them in my bathroom holding Q-tips and cotton balls.
Why would you ever need a new jar when all of these amazing old ones are waiting to be repurposed!
I hope this sampling of ideas have been helpful. Whatever rustic item you choose to repurpose with, I’m sure it will be amazing, and send me a photo!