Stephanie's Slice Of Life

blog, food blog, food blogger, life blog, recipe blog, recipes
  • Blog Feed
  • Tag: blog

    • DIY Homemade Candles

      Posted at 4:06 pm by StephMo
      Jan 27th

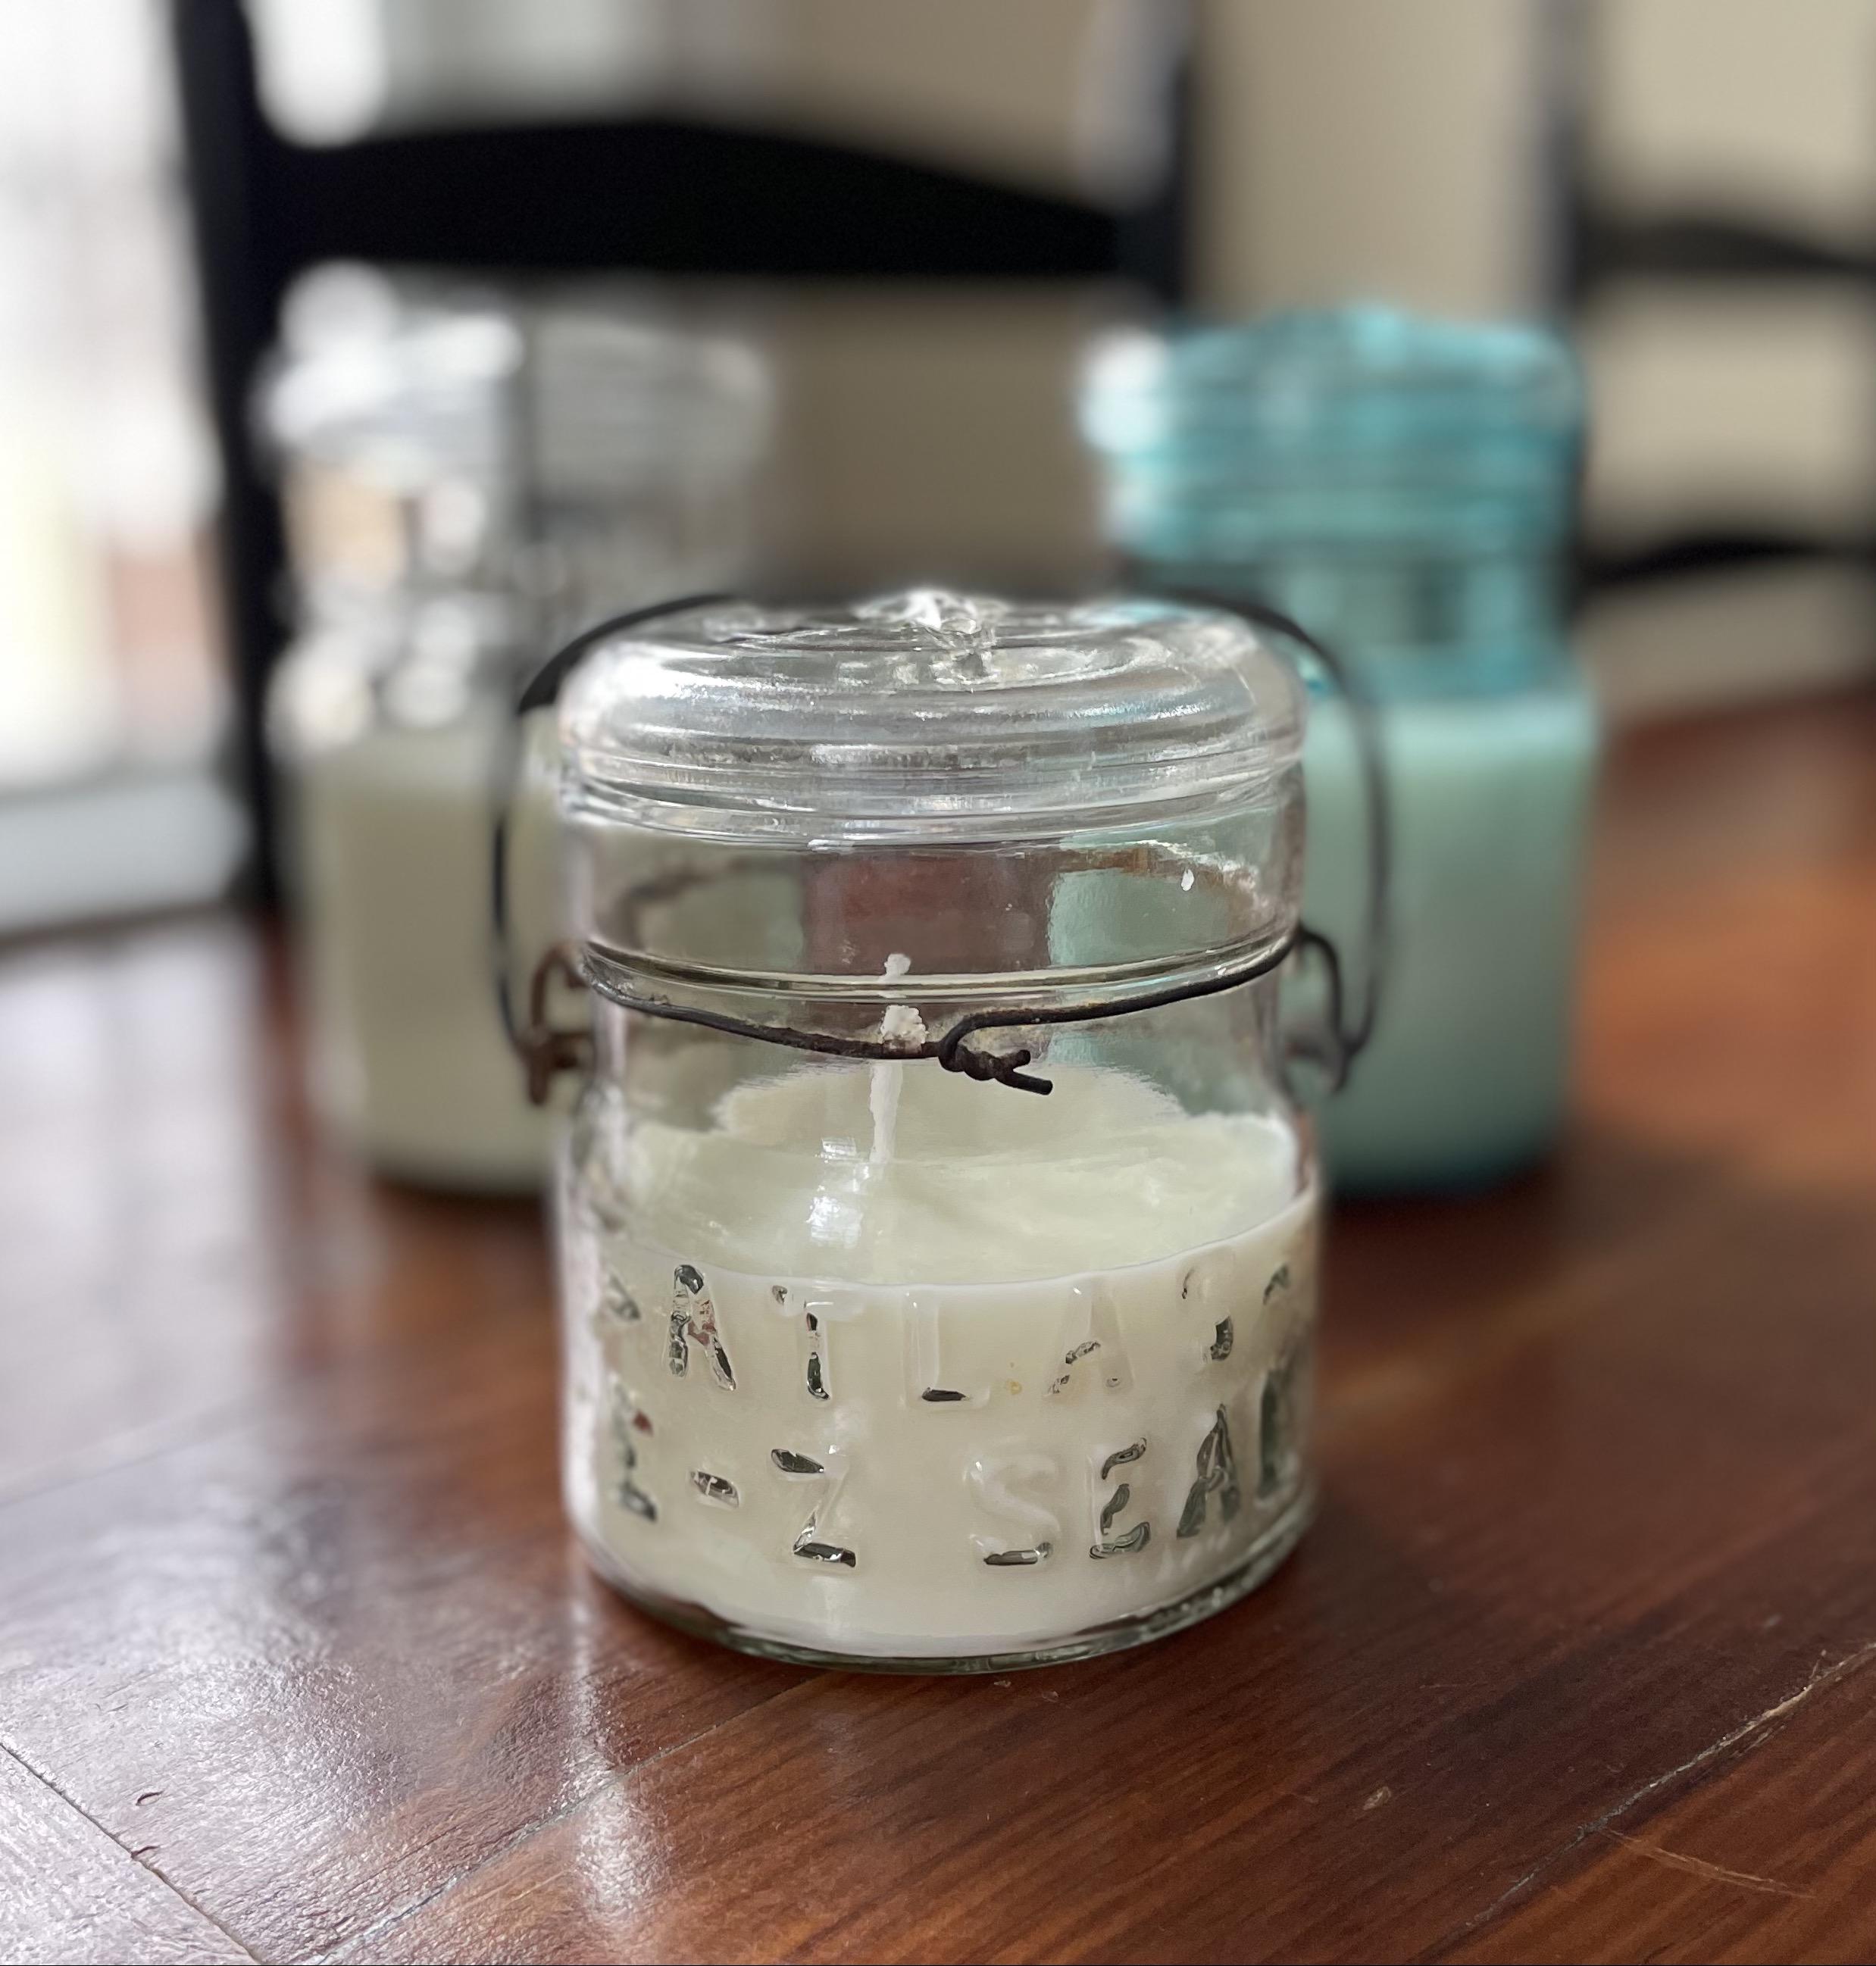
      I am constantly purchasing antique mason jars whenever I see them at estate sales and use them for so many different things. I absolutely love old jars, all kinds of jars actually. I have made snow globes out of antique mason jars, have many decorating my sunporch filled with shells and seaglass that I’ve found, and some on my kitchen window sill helping me root plantings I have cut. As an antique dealer I often use them to sell fun decorative collections of vintage marbles and thread spools. The repurposing possibilities are endless, and I wanted to share another fun use for those fantastic old jars.

      Of course you don’t have to use antique jars to make candles, new mason jars will work just as well.

      Making your own candles is quite easy, the only somewhat difficult part is calculating the wax to container ratio, and the fragrance to wax ratio. You have to remember that wax is measured by weight and not by volume. What this means is if you have a 3 oz. jar that does not mean you use 3 oz. of wax, you use 2.4 oz . I have included a chart below to help you calculate the measurements.

      The first number represents the size of the container by volume, and the second number next to it represents the amount of wax needed by weight.

      3 oz. – 2.4 oz.

      4 oz. – 3.2 oz.

      6 oz. – 4.8 oz.

      8 oz. – 6.4 oz.

      10 oz. – 8 oz.

      And so on.

      If you decide to add a scent to the candles, use fragrance oil specifically for candles. As far as the measurements go, I used .5 oz of fragrance oil for 1 lb. of wax, and .75 oz of fragrance oil for 20 oz. of wax and they smelled nice and not too overpowering.

      You can also color the candles but you need to use dye specifically for candles. Food coloring or crayons will not work perfectly. I did make some candles with crayons for a fun craft idea, but the crayons don’t blend well with the wax and the colors aren’t as nice they would be with candle dye.

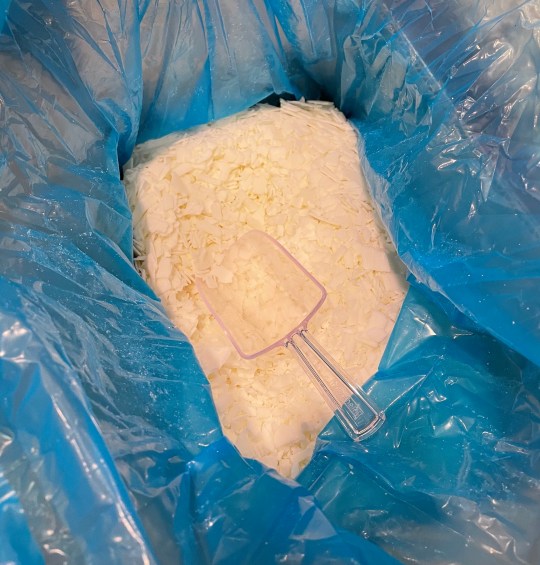
      To start you need some candle wax, I purchased 10 lbs. of soy wax.

      You will need a scale to measure out the wax. I used a kitchen scale that I had and just scooped the wax onto the scale.

      Once the wax is measured, transfer it to a saucepan and melt it on medium heat on your stove. It melts very quickly and easily.

      Once the wax is melted stir in the fragrance if you are using one, and remove it from the heat to cool.

      While your wax is cooling anchor the wick to the bottom of the jar. To do this you can dip it in the melted wax and stick it to the bottom of the jar. Keep in mind once you pour the hot wax into the jar the wick may move. Be sure to either hold it in place while pouring or use a wick holder which sits on the jar as I have.

      Once the wax has cooled for a few minutes you can pour it into the jars. The easiest way to do this is to use a funnel. It not only helps you by not spilling the wax all over your counter, but also helps to keep the wick in place. I tried a few different ways and the funnel was definitely the best option.

      Once the candles have set, trim the wicks with scissors.

      Now they are ready to burn. I am loving not only the coffee scent, but how it looks in this aqua colored antique jar!

      Posted in Blog Posts, Candle Making | Tagged antique mason jar ideas, blog, blogger, candle making, candles, candles in mason jars, diy candles, diy ideas, homemade candles, homemade soy candles, lifestyle blogger, repurposing mason jars, soy candles, stephanie's slice of life
    • Blueberry Pie

      Posted at 8:36 am by StephMo
      Sep 1st

      When I think of Summer in Maine I think of sun, the ocean, friends, family, picturesque shorelines, and blueberries. When I think of blueberries, I think of pies and muffins. While I do have wild blueberries in my yard, they never yield enough for a pie. I can usually pick enough for muffins, which I also made this week, but for the pie I needed to purchase some at a local farm stand.

      It is about this time in the Summer when my husband starts making little comments about pie and wondering where that annual delicious blueberry treat might be. I was a little later than usual this year with my pie and I was starting to get a little nervous that the local blueberries may not be available anymore.

      The only thing I dread about making this pie is cleaning all of those little blueberries. If you aren’t familiar with Maine blueberries, they are the low bush small berries. It is very time consuming and not very fun. Some people might just give them a rinse but I like to go through them and make sure there aren’t any stems or rotten berries in the mix. My son would walk by every now and again and say “Still cleaning those blueberries huh?”.

      This pie is well worth the effort, and your family seeing you at the sink sorting through berries makes them appreciate the pie (and you) even more.

      You can use any pie crust recipe or a store bought crust if you prefer. If you don’t have a recipe for crust I have included the recipe I use at the bottom of the blog.

      Ingredients:

      3/4 cup sugar

      3 tbsp. corn starch

      1/4 tsp. salt

      1/2 tsp. cinnamon

      4 cups blueberries

      Mix together sugar, corn starch, salt, and cinnamon.

      Fold the blueberries gently into the sugar mixture.

      Pour the blueberry mixture into the pie crust.

      Top with another layer of crust or you can make a lattice top like I did. To make the lattice top roll out the dough into a circle and cut the dough into strips.

      Interweave the strips and pinch the edges. My daughter did this lattice work, great job Sara!

      Bake for about 50 minutes at 375 degrees or until bubbly and the crust is slightly brown.

      Pie, pie, me oh my, I love pie!

      Pie Crust Ingredients:

      2 1/2 cups flour

      1 tsp. salt

      3/4 cup butter, cold and cut into small cubes

      1/2 cup chilled shortening, cut into small cubes

      1/4 cup chilled vodka

      1/4 cup cold water

      Whisk together the flour and salt.

      Cut the butter and shortening into the flour mixture with a fork and knife, or a pastry blender until the mixture looks like course crumbs.

      Sprinkle in the water and vodka and mix well until the dough is formed, it will be sticky.

      Divide the dough into two and wrap each half in plastic wrap. Refrigerate for at least an hour.

      Posted in Blueberry Pie, Pies, Recipes | Tagged blog, blueberry pie, blueberry pie recipe, food blog, food blogger, maine blueberries, maine blueberry pie, pie, pie crust, pie crust recipe, pie recipe, vodka pie crust recipe
    • Carrot Cake With Cream Cheese Frosting

      Posted at 10:52 am by StephMo
      Aug 4th

      I can officially say this is my favorite cake, and not just my favorite cake recipe, but my favorite cake. It is better than a bakery. While it is very time consuming to make, it is completely worth it. Unfortunately the vintage lighting in my Maine cottage was not very good for photos 🙁

      Carrot cake was my wedding cake and every year on our anniversary we would buy a carrot cake from the same bakery. When they stopped offering to bake the cake without walnuts, instead of looking for another bakery I decided I would just bake a carrot cake for our anniversary. HUGE thank you to that bakery because this cake is so much better! Now every year on our anniversary we have this cake.

      Even though I do not use walnuts you can absolutely add them to this recipe if you choose. I also only use 1/2 cup raisins because no one in my family likes raisins except me. If you enjoy a carrot cake with more raisins you can increase that to 1 cup.

      Ingredients:

      2 cups sugar

      3 extra large eggs (room temperature)

      1 1/3 cups vegetable oil

      1 tsp. vanilla

      2 cups flour (plus 1 tbsp)

      2 tsp. cinnamon

      2 tsp. baking soda

      1 1/2 tsp. salt

      1 lb. carrots grated

      1/2 cup raisins

      Preheat oven to 400 degrees. Grease two 9″ round cake pans, line with parchment paper, then grease and flour the parchment paper.

      Peel the carrots and grate them using the fine side of a hand grater, you do not want the carrots shredded. Once grated put them aside. This is my least favorite part of making this cake, and pretty much the only reason I don’t make this cake more often.

      In a large mixing bowl combine the sugar, eggs, and oil and beat on medium speed with an electric mixer for 2 minutes.

      Stir in the vanilla.

      In a separate bowl sift together the flour, cinnamon, baking soda, and salt.

      Slowly add the dry mixture to the wet mixture while beating on low speed with the electric mixer. The batter will be thick.

      In a third bowl combine 1 tbsp. of flour with the carrots and raisins and mix well. This helps prevent them from sinking to the bottom of the cakes.

      Have you noticed the vintage Pyrex bowls yet? These were my mother’s, I love everything vintage.

      Stir the carrot mixture into the cake batter and pour into prepared pans.

      Bake for 10 minutes at 400 degrees, then reduce the heat to 350 degrees and bake for another 25-30 minutes until a toothpick comes out clean.

      Cool the cakes in the pans for 15 minutes and then transfer them to wire racks to cool completely.

      Once the cakes are cool it is time to frost these delicious cakes with cream cheese frosting!

      Cream Cheese Frosting:

      1 stick of butter softened (1/2 cup)

      1 8 oz. block of cream cheese softened

      1 1/2 tsp. vanilla

      3 1/2 cups powdered sugar (or more per taste)

      Using an electric mixer on medium speed beat the butter and cream cheese until well mixed and smooth. Add the vanilla and beat just until combined. Beat in the powdered sugar.

      You may like the frosting sweeter and if so, just add a little more powdered sugar.

      Place one of the cakes upside down on a dish or cake stand and start frosting the middle.

      Place the second cake round side up on top of the first cake and finish frosting.

      Make sure to keep the cake covered and refrigerated.

      Then eat, and repeat! Yum!

      Posted in Cakes, Carrot Cake with Cream Cheese Frosting, Recipes | Tagged baking from scratch, blog, blogger, cake, cake recipe, carrot cake, carrot cake recipe, cream cheese frosting, cream cheese frosting recipe, food blogger, from scratch, home baked, homemade, stephanies slice of life
    • Mac And Cheese, Yes Please!

      Posted at 9:26 am by StephMo
      Dec 17th

      If you are anything like me, seeing that picture of melty cheesy goodness over pasta just made your mouth water. Mac and cheese is honestly the most wonderful creation that has ever been created. It is hands down my favorite food group. Yes, I consider it its own food group. It is the true definition of comfort food.

      I am such a lover of mac and cheese than when my daughter was first introduced to it as a baby and she didn’t like it, I actually thought she may have been switched in the hospital. It was not genetically possible for me to have a mac and cheese hating child. Thankfully she came to her senses quickly, and I am happy to say that mac and cheese is now her favorite food as well. Phew!

      Over the years I have played around with how I make it. I have tried different cheeses, different amounts of cheese, different amounts of milk, etc., until I settled on the recipe below.

      I like to use a combination of extra sharp cheddar and gruyere cheeses. I use the entire 8 oz. block of cheddar, and a little more than half of the block of gruyere. It is best to use block cheese, not pre-shredded. I did not shred the cheese for this batch, I just cut the cheese up into small chunks and it melted just as well.

      I start the sauce a few minutes before I put the pasta in to cook. The sauce usually takes about 8-10 minutes. Use a pound of pasta, and any pasta will do. For this classic mac and cheese recipe, I tend to use elbow pasta.

      The first step in making the cheese sauce is to create a roux. A roux is a mixture of flour and fat (butter) to use as a thickener for a sauce. Some recipes I have seen only call for a small amount of flour, but I always use enough to make a very thick roux. I actually added a little more flour after I took the picture below. I have never measured how much flour I use, I just keeping adding small amounts until it gets to the proper consistency.

      Melt 4 tbsp. of butter in a sauce pan over low to medium heat. Add salt and pepper to taste, and about 1/4 tsp. ground mustard. You can use actual mustard as well, which I have done many times. Whisk in flour constantly until you get a thick roux and cook while whisking for about a minute.

      The important thing to remember is not to stop whisking. The sauce will burn on the bottom very quickly.

      While whisking, add 3 cups of milk until it starts to thicken. It will take about 3-5 minutes. Don’t forget, keep whisking!

      Once your sauce has started to thicken and bubble a little, add the cheese. Keep whisking and cooking until all of the cheese has melted. By now your pasta should be cooked.

      Drain the pasta and pour into a greased casserole dish. Pour that heavenly cheese sauce over the pasta and mix well.

      If you don’t have time to make a baked mac and cheese, you can just add the sauce to the pasta and serve as is. Sometimes I prefer to make an unbaked version, or as we call it “a big bowl of cheesy yummy”. When I am not going to bake it I usually use medium shells pasta, it’s just my personal preference.

      For the crumb topping, melt about 2-3 tbsps. of butter in a bowl, add about a cup of panko bread crumbs, and about 1 tbsp. of grated parmesan cheese. Sprinkle evenly over the top to cover all of the pasta. Bake at 350 degrees covered with aluminum foil for 30 minutes. Remove the foil and bake for 5-10 more minutes until bubbly and the crumbs start to brown.

      Then dig in! Nom, nom nom!

      Posted in Comfort Food, Dinners, Macaroni and Cheese, Recipes | Tagged blog, cheese, food blog, food blogger, mac and cheese, mac and cheese recipe, mac n cheese, mac n cheese recipe, my slice of life blog, recipe blog
    • The Bark That’s Better With Every Bite – Peppermint Marble Bark

      Posted at 2:31 pm by StephMo
      Dec 12th

      Technically you can make a chocolate bark by melting chocolate and throwing whatever you like in it. While you may really like the taste of anchovies and crushed Kit Kats, I am thinking the recipients of your holiday bark may prefer something a little more mainstream and festive. Even though I have made many a different bark over the years, this peppermint marble bark is my go to favorite.

      I use Baker’s Semi-Sweet Chocolate and Baker’s White Chocolate if I can find it. Most stores don’t seem to carry the white chocolate, and if not I prefer to use Ghiradelli White Chocolate Chips. This recipe has a really great taste and I recommend sticking with the semi-sweet chocolate, and sticking with the Baker’s brand. You will need 1 package of each.

      Not only is this a great tasting and impressive looking bark, it allows you to get out some of your holiday frustrations. You will need a cup of crushed candy canes or peppermint starlight candies and the best way to crush them, is to smash them. I put a bunch in a plastic bag and have at them with a wooden mallet. Instant stress relief. And an instant mess if you use a thin plastic bag.

      Once you are done annihilating your mints, line a cookie sheet with wax paper. Microwave the semi-sweet and white chocolates in separate bowls. Start with a minute, stir the chocolate, and continue in 30 second intervals until melted. Be careful with the white chocolate because it can burn easily.

      Stir half of the crushed mints into each bowl of chocolate. Drop spoonfuls of each chocolate close to each other on the baking sheet and smooth the chocolate to the thickness you prefer. Once all the chocolate is laid out, use a knife to swirl the chocolates together to marbleize them.

      Refrigerate the bark until firm, and then just break into pieces. Store in an air tight container.

      Posted in Holiday Treats, Peppermint Marble Bark, Recipes, Sweet Treats | Tagged bark, bark recipe, blog, blogger, chocolate bark, food blog, holiday baking, marble bark, peppermint bark recipe
    • I’m Melting! Adorable Melted Snowmen Cookies

      Posted at 12:47 pm by StephMo
      Dec 6th

      These melting snowmen cookies bring instant smiles to children and adults. They actually make me giggle, but I am easily amused. I am not going to lie though, they are a pain in the neck to make, but the reaction you get from them is worth it. When you are about to make these cookies set yourself out a chunk of time, put on some music, and pour yourself a large cup of coffee because you are in it for the long haul. I’m exaggerating slightly, but they are time consuming.

      I found this recipe on-line years ago, but after many different attempts at making these I have settled on a slightly different version. If you look you on-line you will see that people do these all different ways. However, I think mine are the best 😉

      I know I have said before that I always make my cookies from scratch, but these are my one exception. If this recipe was the only cookie I was making I may be tempted to make a homemade sugar cookie, but I make so many different varieties around the holidays that I just cut corners on this one. They take so long to put together and they are more about the cuteness than about the taste anyway.

      So the first thing I do is cut open the roll of Pillsbury Sugar Cookie dough and bake the cookies. Once they are done they need to cool completely before decorating. The good thing about this recipe is that you can bake the cookies hours or even a day before and decorate them when you are ready.

      You will need a bag of large marshmallows for the heads. They look better if you cut off one end of the marshmallow. Since I hate to waste food, I usually munch on the ends that aren’t needed. Or you could save them and put them in hot chocolate? I prefer to just eat them.

      Once those are done you will need orange sprinkles long enough to be the carrot nose. If you can’t find just orange sprinkles, you will need to fish through a container of colored sprinkles which is what I typically end up doing. Even though I have seen multicolored carrots before, I haven’t yet gotten to the point where my snowmen have had purple and yellow noses. All you need to do is push the orange sprinkle into the marshmallow far enough until it stays.

      When I first tried making these cookies I used black decorator’s gel for the eyes and mouth. Personally I find that it is not only easier to use a food marker, but I think it looks better. By food marker I do not mean a Sharpie, they sell edible markers at craft stores. I like to make a circle for the mouth to give it a “oh no I’m melting” look. You could make a smiley face, but I’m pretty sure that snowmen would not be too happy about melting. Frosty never seemed to be anyway.

      Now it’s time to make the melting snow. The first year I made these cookies I used a store bought icing. The next year I purchased a different icing that didn’t work well, and instead of running out to the store I decided to just make my own icing instead. That is what I have continued to do since then.

      Icing Recipe:

      Mix together 1 cup of confectioners sugar and 2 tsps. milk until smooth. Beat in 2 tsps. of corn syrup until it looks smooth and glossy. If it is too thick, add a little more corn syrup.

      I use a spoon to drop some icing onto one side of the cookie, and then tilt the cookie while turning it so that it looks like melted snow. I also like to let a little run off of the sides. Make sure to stick on the marshmallow heads before the icing sets, the icing acts as a glue to hold the heads in place. Make sure the icing really sets before you finish decorating.

      Originally I also tried using black gel for the arms but had difficulty with those as well, and decided to just use the food markers. I am not really sure why I seem to have so much difficulty with such things, maybe it’s just me. If you are more skilled than I am with decorator’s frosting or gel, you may decide to use that instead. If you decide to use the food markers, you have to use a very light touch because it cracks through the icing.

      The last step is using gel to make a scarf. Then let the smiles and giggles begin!

      Posted in Cookies, Holiday Treats, Melted Snowmen Cookies, Recipes | Tagged blog, blogger, cookie recipe, food blog, food blogger, holiday cookies, melting snowmen cookie recipe, melting snowmen cookies, snowman cookie, snowmen cookies
    • Did Someone Say Wine and Cream? Delicious Bolognese Recipe

      Posted at 6:12 pm by StephMo
      Nov 27th

      Despite Ancestry.com stating that I am 8% Italian, I really don’t get as excited over red sauce as some other people. While my mother’s red sauce recipe that I use makes a really good “gravy” that is better than I have had elsewhere, I can usually take it or leave it. Even though I make sauce fairly often, and only ever make my own, I am usually more into the meatballs, lasagne or chicken cutlet parmesan that accompanies the sauce. I tend to be more of a cream or cheese sauce kind of girl.

      Even if you eliminated the 1/4 cup of heavy cream called for in this recipe, I’m sure it would still be amazing. For me, however, I add more than the required amount, probably about 1/2 cup. I have never measured how much I add, and I tend to be heavy handed with cream so gauge it on your own personal taste. You will probably notice Ina Garten’s picture looks a little more red than mine. I also have only ever made this with ground turkey, and to me you really don’t notice the difference.

      https://barefootcontessa.com/recipes/weeknight-bolognese-1

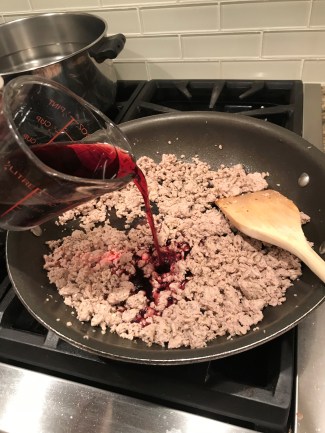
      As with making my own red sauce, if a recipe calls for red wine then it automatically means you have to pour a glass for yourself. Last night while making the Bolognese my husband only saw the measuring cup of wine and asked “have you started drinking out of measuring cups now?” Of course not! Unless there weren’t any glasses, silly! Thankfully I have plenty of wine glasses and haven’t had to resort to Pyrex yet.

      While I never cut the amount of red wine I pour in my glass, I do cut the amount the recipe calls for. The first time I made this Bolognese I followed the recipe word for word, but my family didn’t like the overpowering wine taste. Instead of the 1 1/4 cups the recipe calls for, I use 3/4 cup total. While I would love to be able to say I have fresh herbs in my kitchen at all times, I don’t. For those of you that are like me, I usually just reach into my spice cabinet when a recipe calls for basil. I just use about 1 tbsp. of dried basil, maybe not even, instead of the fresh basil noted.

      It is an absolutely delicious recipe! While the Weeknight Bolognese isn’t a very difficult recipe, there are a number of steps. Make sure you are only heavy handed pouring the cream and not the wine or you might find this recipe hard to follow 😉

      Posted in Bolognese, Comfort Food, Dinners, Recipes | Tagged blog, bolognese, bolognese recipe, dinner, family dinner, food blog, food blogger, foodie, weeknight bolognese
    • This Chocolate Cake Recipe Really Does Take The Cake

      Posted at 8:38 pm by StephMo
      Nov 12th

      When we moved into our home 13 years ago, our neighbor baked us a bundt cake. I don’t remember what frosting it had on it, I only remember the cake was fantastic. Come to find out it is the recipe on the back of the Hershey’s Cocoa container. Believe me when I say, this cake, really takes the cake!

      It is the only chocolate cake I will make, and have made since then. I usually make it as a bundt cake, but have made cupcakes and a sheet cake over the years as well. It has been the only cake my daughter requests on her birthday for I don’t even know how long. And since her birthday was 4 days ago, I just made one!

      When the cake is for my daughter, I just use Betty Crocker’s Vanilla Glaze recipe. When it’s for someone else, I put Betty Crocker’s Chocolate Glaze on top of the vanilla glaze. My daughter isn’t a big fan of chocolate glaze, that’s why I don’t make it for her, not because I don’t think she’s worthy lol.

      ** A few tips, first make sure to sift the dry ingredients, especially when using cocoa powder. Also, I use water from the tap because mine gets really hot. I have used it when it didn’t get quite as hot, and the recipe doesn’t work well.

      Here is the cake recipe, or you can take it right off of the container.

      Ingredients:

      2 cups sugar

      1 3/4 cups flour

      3/4 cups cocoa powder

      1 tsp. salt

      1 1/2 tsp. baking powder

      1 1/2 tsp. baking soda

      2 eggs

      1 cup milk

      1/2 cup vegetable oil

      2 tsp. vanilla

      1 cup boiling water

      Preheat oven to 350 degrees. Grease and flour a bundt pan (or whichever pans you prefer).

      Sift all of the dry ingredients together. As I stated earlier, it is really important to sift the ingredients and not just mix.

      Add the eggs, oil, milk, and vanilla and beat with an electric mixer on medium speed for two minutes while scraping the sides constantly.

      Add the water into the batter and mix well with a spoon or spatula, the batter will be very loose. Pour into the prepared pan and bake for 30 – 35 minutes until a toothpick or knife comes out clean.

      This cake is so moist it doesn’t even need glaze, but why not add a little butter right? Yum.

      The glaze recipes are from Betty Crocker’s New Cookbook, which I received as a wedding shower gift in 1998. It’s always been my “go to” cookbook. I don’t believe these recipes are on-line, so here they are.

      Vanilla Glaze:

      1/3 cup butter

      2 cups powdered sugar

      1 1/2 tsp. vanilla

      2 to 4 tbsp. hot water

      Melt the butter in a saucepan and remove from the heat.

      Stir in the vanilla, then stir in the powdered sugar and add hot water 1 tbsp. at a time until the glaze is smooth and consistency of thick syrup.

      Then you can just drizzle the glaze how ever you would like over the cake.

      Chocolate Glaze:

      1/2 cup semisweet chocolate chips

      2 tbsp. butter

      2 tbsp. corn syrup

      1 to 2 tsp. hot water

      Heat the chocolate chips, butter, and corn syrup in a saucepan over low heat, stirring constantly until the chocolate chips are melted. Cool slightly.

      Stir in the hot water 1 tsp. at a time until the consistency of thick syrup.

      Drizzle over the cake just as I have the vanilla glaze. As I mentioned previously, the chocolate glaze is amazing on top of the vanilla glaze. Yum!

      Posted in Cakes, Chocolate Cake, Recipes | Tagged baking, betty crocker recipe, blog, blogger, bundt cake, chocolate cake, chocolate glaze, food blogger, vanilla glaze
    • When life gives you lemons, make Avgolemono (Greek) soup

      Posted at 6:47 pm by StephMo
      Nov 12th

      I’ve spent the last four days home sick with a pretty miserable cold. My husband is such a caring man, and he will run out at any time to get us whatever we need, but this weekend he topped it all. He went to the store to get me chicken soup and when he came home with a few different varieties, he also said “I bought the ingredients to the lemon soup you make in case you feel like making it”. I couldn’t even get mad, it was just so funny. Needless to say, I didn’t make the soup. Nice try.

      However, I am feeling a little better today and since he bought the ingredients for Avgolemono, I decided to make it. I love this soup mostly because it reminds me of my grandmother. This isn’t her recipe, but I have been using it for about 20 years since I cut it out of a Cooking Light magazine.

      The recipe didn’t call for chicken, but I always add maybe about a cup or more of shredded cooked chicken. I can’t find the recipe on-line, so here it is – enjoy!

      Ingredients:

      2 cups chicken broth

      1 cup water

      3 tbsp. lemon juice

      2 large eggs, lightly beaten

      1 cup hot cooked rice

      1/2 teaspoon salt

      1/8 teaspoon pepper (or more depending on taste)

      1 cup shredded cooked chicken

      Shred chicken while you are cooking the rice and set aside.

      Lightly beat an egg and combine with lemon juice.

      Which came first, the chicken or the egg? Sorry, I couldn’t resist.

      Heat broth and water in a medium saucepan over medium-high heat.

      Turn off heat and gradually add egg and lemon juice mixture to hot broth mixture, whisking constantly. You need to be careful the egg doesn’t scramble.

      Cook over medium heat until slightly thick (about 15 minutes), whisking frequently.

      Stir in rice, chicken, salt, and pepper and continue to cook on low/medium heat for a few minutes.

      And serve! Delicious!

      Posted in Avgolemono (Greek Lemon Soup), Recipes, Soup | Tagged avgolemono, blog, blogger, chickensoup, cooking light recipe, food blogger, greek lemon soup, my slice of life, soup recipe
    • Categories

      • Blog Posts
        • Alpaca Trek
        • Candle Making
        • DIY Sea Shell Shadow Boxes
        • Jammie Day in Boothbay Harbor, ME
        • Mason Jar Snow Globes
        • My Mom's Recipes❤️
        • Repurposed Cobbler's Rack
        • Restaurants
      • Cocktails
        • Apple Cider Bourbon
        • Chocolate Raspberry Martini
        • Cosmopolitan Martini
        • French Vanilla Martini
        • Lemon Blueberry Martini
        • Lemon Raspberry Martini
        • Pumpkin Pie Martini
        • S'Mores Martini
        • Taste of Summer
      • Recipes
        • Appetizers
          • Bacon Wrapped Scallops
          • Broccoli Christmas Tree
          • Chinese Stuffed Buns
          • Easy Nachos
          • Guacamole
          • Potato Chips
          • Sausage Wontons
          • Spinach and Cheese Arancini
          • Truffle Parmesan Popcorn
        • Breads
          • Apple Bread
          • Brioche Bread Pudding
          • Cheesy Garlic Bread
          • Chocolate Chip Banana Bread
          • Chocolate Chip Pumpkin Bread
          • Cinnamon Rolls
          • Coffee Cake
          • French Bread
          • Irish Soda Bread
          • Italian Cold Cut Calzone
          • Popovers for Piglet
          • Scones
          • Zucchini Bread
        • Brunch
          • Baked French Toast
          • Biscuits and Sausage Gravy
          • Cheesy Grits
          • Chocolate Waffles
          • Pumpkin Pancakes
          • Waffles
        • Cakes
          • Carrot Cake with Cream Cheese Frosting
          • Chocolate Cake
          • Chocolate Chip Cake
          • Chocolate Chip Cheesecake
          • Coconut Raspberry Layer Cake
          • Pumpkin Roll
          • Pumpkin Whoopie Pies
          • Ricotta Cheesecake
        • Comfort Food
        • Cookies
          • Candy Cane Cookies
          • Chocolate Chip Cookies
          • Chocolate Dipped Peppermint Shortbread Cookies
          • Coconut Macaroons
          • Italian Seed Cookies
          • Koulourakia
          • Lemon Anginetti Cookies
          • M&M cookies
          • Melted Snowmen Cookies
          • Pizzelles
          • Shortbread Jam Sandwich Cookie
        • Dessert
          • Baked Rice Pudding
        • Dinners
          • Baked Pork and Apples
          • Bolognese
          • Buffalo Chicken Mac and Cheese
          • Chicken Croquettes
          • Chicken Cutlet Parmesan
          • Chicken Fried Rice
          • Chicken Parmesan
          • Chicken Pot Pie
          • Chili and Cornbread
          • Dijon Baked Halibut
          • Fish Cakes
          • Fish Tacos
          • Homemade Pasta
          • Homemade Pizza
          • Lasagna
          • Lemon Arugula Pasta
          • Macaroni and Cheese
          • Meatballs
          • Meatloaf
          • Mexican Taco Pasta
          • Mustard Chicken Salad
          • Oven Fried Chicken and Waffles
          • Prosciutto Lamb Burgers
          • Pulled Pork
          • Spinach Sausage Strata
          • Turkey Pork Meatloaf
          • Turkey Zucchini Rice
        • Dips
          • Hummus
        • Holiday Treats
          • Brownie Trees
          • Chocolate Dipped Pretzels
          • Halloween Treats
          • Peppermint Marble Bark
        • Jams
          • Strawberry Jam
        • Muffins
          • Blueberry Muffins
          • Chocolate Chip Muffins
        • Pies
          • Apple Crisp
          • Blueberry Pie
          • Chocolate Chip Pie
          • Key Lime Pie
          • Pumpkin Pie
          • S'Mores Pie
          • Vodka Pie Crust
        • Salads
          • Cauliflower Salad
          • Chicken Salad
        • Sauces
          • Italian Red Sauce
          • Pesto
          • Pesto Cream Sauce
        • Side Dishes
          • Mexican Street Corn
          • Potato Latkes
        • Soup
          • Avgolemono (Greek Lemon Soup)
          • Buffalo Chicken Soup
          • Lamb Bourguignon
          • New England Fish and Corn Chowder
        • Sweet Treats
      • Uncategorized

Powered by WordPress.com.