Stephanie's Slice Of Life

  • Blog Feed
  • Category: Holiday Treats

    • Matzo Chocolate Toffee Crack

      Posted at 4:41 pm by StephMo
      Mar 23rd

      I had never heard of this type of “crack”, nor was I familiar with Matzah crackers until recently. A parent at my daughter’s school asked if I could make this for her son for Passover and I offered to give it a try. Now I know why it is called crack, it is so addictive! This is now one of my favorite recipes, so good!

      Ingredients:

      5 unsalted Matzah crackers

      1 cup butter

      1 cup dark brown sugar

      1 12oz. bag of semi-sweet chocolate chips

      Sea salt

      Chopped pecans, optional

      Line a large cookie sheet with aluminum foil. Cover the pan with the crackers. They don’t break as easily as I expected and I had to use a knife to cut them.

      Combine the butter and brown sugar in a saucepan and cook over medium heat until melted while whisking. Bring the mixture to a boil and continue whisking and boiling for 3 minutes.

      Pour the toffee mixture over the crackers, then spread with a small spatula to cover the crackers.

      Bake at 350 degrees for 8 -10 minutes or until all of the toffee is bubbling.

      Top with the chocolate chips and let sit for a minute or so. Once they have softened spread over the toffee.

      Sprinkle with coarse sea salt and chopped nuts if you desire, and refrigerate until completely set. Mine took about an hour.

      Once set, cut into squares or break into pieces. Yum!!!!

      Matzah Chocolate Toffee Crack

      Print Recipe Pin Recipe

      Ingredients
        

      • 5 Matzah Crackers, unsalted
      • 1 cup butter
      • 1 cup dark brown sugar
      • 1 12 oz. bag semi-sweet chocolate chips
      • 1 tbsp. coarse sea salt

      Instructions
       

      • Line a large baking sheet with aluminum foil. Arrange the crackers to fill the pan.
      • Melt the butter and brown sugar over medium heat while stirring with a whisk. Bring to a boil and continue whisking and boiling for an additional 3 minutes.
      • Spread the toffee mixture over the crackers. Bake at 350 degrees for 8-10 minutes or until the toffee is bubbling.
      • Top with chocolate chips and let sit until soft. Spread over toffee. Sprinkle with sea salt.
      • Refrigerate until set. Cut or break into pieces.
      Posted in Holiday Treats, Matzah Toffee Crack | Tagged chocolate matzah, chocolate matzo, food blog, food blogger, matzah crack, matzah toffee crack, matzo chocolate, matzo toffee crack, passover treats, Recipes, stephanie's slice of life
    • Easter Bird’s Nest Cupcakes

      Posted at 3:37 pm by StephMo
      Mar 22nd

      So many of my recipes come from my trusty Betty Crocker cookbook as I have mentioned in the past, and this is one of them. Sometimes I bake use the Silver White Cake recipe, but today I made the Starlight Yellow Cake recipe. Super easy recipe and it only uses one bowl! That in itself makes the recipe worth using, not to mention the added bonus that it is yummy!

      As you can see the cupcakes I made were transformed into bird’s nests for Easter. I think they came out pretty cute if I do say so myself. Here is how to make nest cupcakes:

      First you need to bake the cupcakes.

      Ingredients:

      2 1/4 cups flour

      1 1/2 cups sugar

      1/2 cup shortening

      1 1/4 cups milk

      3 1/2 tsp. baking powder

      1 tsp. salt

      1 tsp. vanilla

      3 eggs

      Heat oven to 350 degrees. Either grease a cupcake pan or use liners. I decided to use paper cupcake liners for my cupcakes today.

      In a large mixing bowl combine all of the ingredients.

      With either a hand mixer or a stand mixer, beat for 30 seconds on low speed. If using a hand mixer make sure to scrape the sides constantly.

      Turn mixer to high speed and continue beating for 3 minutes scraping occasionally. Since I was using a stand mixer I turned it off every minute or so to scrape the bowl.

      That’s it! Could it be any more simple?

      Fill each opening a little more than half way with the batter.

      Bake for approximately 20 minutes or until a toothpick inserted comes out clean. Cool on a wire rack.

      Once they are cool I frosted them with vanilla buttercream frosting. Here is the recipe I use, also quite easy.

      Vanilla Buttercream Frosting

      Once you have your frosting made just spead some over each cupcake and dip into green sprinkles.

      To make the nest I used melting chocolate and squeezed it in the shape of a nest on top. You can also use chocolate frosting. Here’s a tip for using chocolate, only do part of the nest at a time and let the chocolate set and then go over it with more chocolate. Otherwise the chocolate will just blend together.

      Once the chocolate was set, only takes a minute, I used a tiny bit on the egg so that it would stick on top. I used large Robin Eggs candies so I only used one egg, if you are to buy the mini eggs you can fit more than one.

      Starlight Yellow Cake

      Print Recipe

      Ingredients
        

      • 2 1/4 cups flour
      • 1 1/2 cups sugar
      • 1/2 cup shortening
      • 1 1/4 cups milk
      • 3 1/2 tsp. baking powder
      • 1 tsp. salt
      • 1 tsp. vanilla
      • 3 eggs

      Instructions
       

      • Preheat oven to 350 degrees. Grease pan or use cupcake liners.
      • Combine all of the ingredients in a large mixing bowl.
      • Beat on low speed for 30 seconds scraping constantly. Continue beating on high speed for 3 minutes scraping occasionally.
      • Pour into pan(s) and bake for 20 minutes for cupcakes, 40 minutes for rectangle, or 30 minutes for rounds or until a toothpick inserted comes out clean. Cool on wire racks.

      Posted in Easter Bird's Nest Cupcakes, Holiday Treats | Tagged bird's nest cupcakes, easter baking, easter cupcakes, easter treats, food blog, food blogger, nest cupcakes, starlight yellow cake recipe, stephanie's slice of life, yellow cake recipe
    • Shortbread Jam Sandwich Cookies

      Posted at 10:03 am by StephMo
      Dec 19th

      Let me just start by saying that these cookies are one of the best cookies I have ever had. Unbelievably good. So good that when my daughter and I tasted the first batch we both looked at each other while chewing and said maybe we should just eat them all and not give them out. We were joking, kind of, maybe not actually. We had restraint, however, and only ate a few while saving the rest to give out to family and friends.

      The nice thing about this recipe is they don’t have to be made as sandwich cookies. You can just bake the shortbread in any shape you would like and either eat them plain, or dip part of them in chocolate. Whichever way you decide to make them they will just melt in your mouth.

      Ingredients:

      3 sticks of butter, softened

      1 cup sugar

      1 tsp. vanilla

      3 1/2 cups flour

      1/4 tsp. salt

      Raspberry jam or preserves

      Confectioner’s sugar

      In a large mixing bowl combine the butter and sugar with an electric mixer on medium speed until well combined.

      Add the vanilla and mix until combined.

      Sift together the flour and salt in a small bowl and gradually add to the butter mixture while beating on low speed until combined.

      Now this is where the recipe gets a little tricky. As you can see, it doesn’t look very combined or together for that matter. However, it is right and how it should be.

      Start squeezing together handfuls of the dough and put them on a lightly floured board. The dough will come together with time but you need to work at it with your hands.

      As you can see after a few minutes and a little patience the shortbread dough came together and looks great.

      Wrap the dough in plastic wrap and refrigerate for at least 30 minutes.

      Using a section of the dough at a time, roll out on a lightly floured board until about 1/4″ thick and cut into shapes.

      If you are making the sandwich cookies, you can either use all solid shapes or you can cut a shape in the center of the cookie for the jam to show. Place the cookies on an un-greased cookie sheet and bake at 350 degrees for around 8 minutes for the cookies with holes, and around 10 minutes for the solid cookies. Keep an eye on them and they are done when they are slightly brown.

      While the photo shows the two cookies together on the cookie sheet, don’t bake them together as they really do have different cooking times.

      Let cool on the cookie sheet for a minute or so and transfer to a wire rack to cool completely.

      Once cool spread jam on the flat side of the bottom cookie. Spread lightly on the edges and leave more in the center for where the hole will be.

      Sprinkle confectioner’s sugar on the top cookie then place on top of the jam covered bottom cookie.

      Now the most important thing is trying to stop yourself from eating them all. Trust me, it isn’t easy.

      Posted in Cookies, Holiday Treats, Shortbread Jam Sandwich Cookie | Tagged butter cookies, food blog, food blogger, raspberry jam shortbread, Recipes, shortbreaad jam sandwich cookie, shortbread cookie recipe, shortbread cookies, shortbread jam cookie, shortbread sandwich cookie, stephanie's slice of life
    • Broccoli Christmas Tree

      Posted at 2:24 pm by StephMo
      Dec 9th

      Oh Broccoli Christmas tree, oh Broccoli Christmas tree, la la la la, la la la. I have been making this adorable vegetable tree on Christmas Eve for years. Since this year will be a little different and I probably won’t be making it, I decided to make it today! Why not, right?

      You can serve this with any dip you prefer or even dressing. While my husband would most likely be content chomping on these vegetables without any dip, most of us really only eat the vegetables so we can eat the dip. I sometimes serve it with a simple vegetable or ranch dip, or sometimes with a blue cheese dip (recipe below). Today I decided I was in the mood for blue cheese dip. When am I not in the mood for blue cheese honestly.

      For this little healthy holiday appetizer you only need four ingredients : broccoli, cauliflower, a yellow pepper, and cherry tomatoes. Simple, simple.

      Cut off the stems on the broccoli and the cauliflower. Save a little piece of the broccoli stalk to use as a stem for the tree.

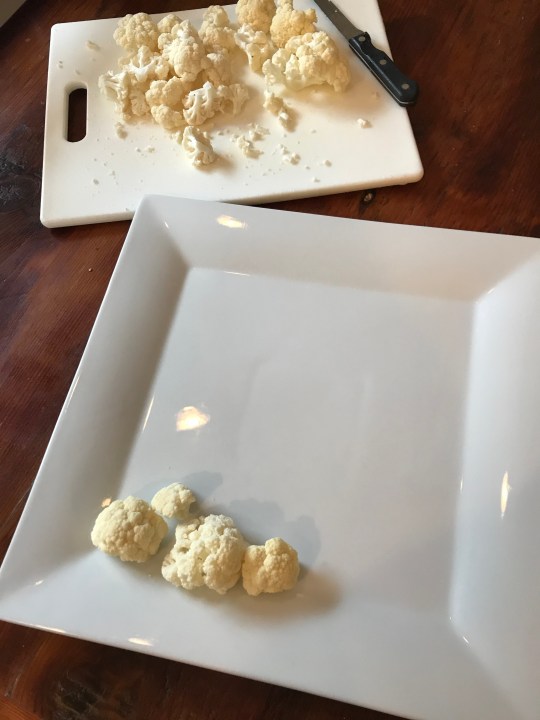
      Start assembling the snow (cauliflower) on a large platter, and then start building the tree.

      Pop a few tomatoes on as ornaments. Use a star shaped cookie cutter with the yellow pepper to make the star. You can put more stars on the tree or on the platter, whatever you like.

      And that is it! So simple and so impressive right?

      Now for the best part, the recipe for the Blue Cheese Dip.

      Ingredients:

      1 cup crumbled blue cheese

      1/4 cup mayonnaise

      1/2 cup sour cream

      1 tbsp. milk

      1 tbsp. lemon juice

      dash of pepper to taste

      dash of garlic powder to taste

      1 tbsp. sliced scallions.

      Mix all of the ingredients together and chill. This dip will taste better once it has been chilled for a few hours.

      Serve alongside your pretty tree! Yum!

      Posted in Appetizers, Broccoli Christmas Tree, Holiday Treats | Tagged appetizer, appetizer recipe, blue cheese dip, blue cheese dip recipe, broccoli christmas tree, broccoli tree, food blog, food blogger, holiday appetizer ideas, holiday appetizer recipe, holiday appetizers, Recipes, stephanie's slice of life, vegetable tray and dip, vegetable tree
    • Halloween Treats

      Posted at 11:20 am by StephMo
      Oct 31st

      Happy Halloween!! When my children were younger I used to love decorating for Halloween and making spooky fun treats. I haven’t had the opportunity in a few years but I loved looking back at these photos and remembering how much fun my children had.

      One of my favorite creations was this meat foot, in fact I think I will make this tonight for dinner. Why not, right? My husband might think I’ve lost it, but I am pretty sure he already does.

      I just made a regular meatloaf, you can use any recipe you like. Shaped it into a foot, used onion slices as toenails and more slices and a chunk of onion for the bone stump (gross to even say that), and ketchup as blood. Then just bake it as you normally would and voila! Spooky meatloaf!

      This Guacamole Frankenstein is perfect for younger kids, or older. Spread guacamole onto a platter, use blue corn tortilla chips as the “hair”, sour cream as the eyes, and then use black olives as the facial features. So cute!

      Every Halloween gathering needs a spooky Witch’s Brew! This Eyeball Punch was just plain fruit punch with some floating plastic eyeballs. Of course if it is for an adult party you can add some alcohol if you choose.

      Who doesn’t love Deviled Eggs? Halloween is a perfect time to turn those deviled eggs into bloodshot eyes. Make them as you normally would, add a black olive slice and a little red gel frosting, and there you go!

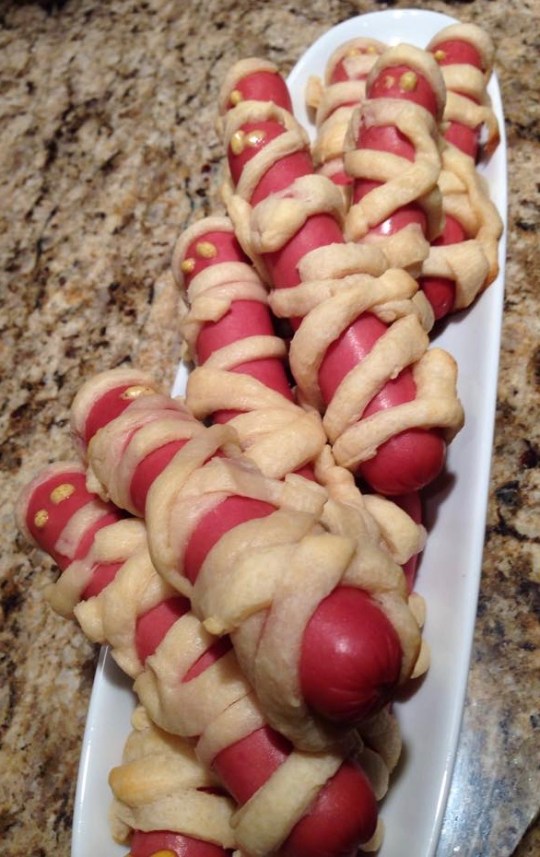
      And of course the classic Pillsbury Crescent Rolls Mummy hot dogs. So easy and fun, and yummy!

      Ok, now this final Halloween treat is gross. Really, really gross so be prepared.

      This was one of the funniest, and grossest, things I have ever made and tricked someone with. Years ago, hence the poor quality photo, when my husband and I were first married we had a Halloween party and put out this cake to fool people. At the time we did have a cat which made this cake more believable. I think the worst part was that until everyone found out it was a cake, people thought we were the type of people that left a dirty litter box in the middle of our kitchen.

      At one point during the party my husband picked up the “litter box” and said he was sorry it was there and excused himself to go empty it. As he was walking through our guests he picked up the scoop and took a bite. The look of pure horror on everyone’s face was priceless!

      Warning, this cake looks real and absolutely disgusting in person. Even though you know it is a new clean litter box and scoop, it still grosses you out to eat from it.

      Kitty Litter Cake

      Ingredients:

      2 boxes yellow cake mix

      1 package of vanilla sandwich cookies like Oreos

      1 package vanilla pudding mix

      Green food coloring

      Tootsie Rolls

      Cook the cake as directed, cool and crumble. Crush the sandwich cookies into crumbs. Prepare the pudding as directed.

      Mix the crumbled cake with the pudding and half of the crushed cookies. Spread the cake mixture into the kitty litter pan. **New and clean kitty litter pan.

      Mix the remaining half of the crushed cookies with a few drops of green food coloring, this makes it look like the chlorophyll in actual kitty litter. You don’t want the mixture green, but for there to be little bits of it green here and there.

      Sprinkle the green tinted crushed cookies over the top of the cake.

      Microwave the Tootsie Rolls for a few seconds until they are soft enough that you can shape them to look like poop. So gross, I know!

      Then place them on the cake as a cat would, and kind of bury them a little.

      Serve with a new, clean kitty litter scoop.

      Posted in Blog Posts, Halloween Treats, Holiday Treats | Tagged food blog, food blogger, halloween food ideas, halloween food recipes, halloween recipes, halloween treats, lifestyle blogger, mom blogger, mom life, Recipes, spooky food ideas, spooky treats, stephanie's slice of life
    • Oh Brownie Tree, Oh Brownie Tree – Cute Brownie Recipe

      Posted at 8:46 am by StephMo
      Dec 13th

      These brownie trees are so festive and fun! I saw a picture of something similar and decided to add these to my holiday goodies this year. Although my children are older, this could be a perfect activity with little ones as well. With a simple extra step you can turn your plain brownies into an impressive holiday treat! And if you have better cutting skills than I do, they will look even more impressive.

      As with all my brownies, I use the Baker’s One Bowl Brownie recipe. I have posted about this recipe in other blog posts, and am sure I will post about it again. It’s incredibly easy, and it’s my favorite. Here is the link to the recipe:

      https://www.myfoodandfamily.com/recipe/054515/bakers-one-bowl-brownies

      Once the brownies have cooled completely, it is time to start cutting. If you use an 8″ pan cut them in half horizontally, then make the triangle slices to form the trees. I used a 9″ x 13″ pan to yield more brownies which made it a little more difficult to cut into similar sized shapes.

      As you can see my trees cracked somewhat and don’t have the smoothest edges. I’ve mentioned before that I must not have been paying attention in Kindergarten the day they showed us how to make circles, well I also must not have been paying attention the day we went over straight lines either. I probably should have tried to cut them into perfect squares and then would have ended up with the perfect triangles I needed 😉

      Once the brownies are cut and laid out, melt some white chocolate and fill a decorating container with a fine tip. Gently squeeze the chocolate on to the brownies and add sprinkles before the chocolate hardens. You could add green food coloring to your chocolate, or you could even use mint chocolate melting wafers. Today I just used Ghiradelli white chocolate chips that I had in the house.

      And that is it! Your adorable brownie trees are ready!

      Posted in Brownie Trees, Cookies | Tagged baking blog, brownie recipe, brownie tree recipe, brownies, food blog, food blogger, holiday treats, life blogger, my slice of life blog, one bowl brownies, Recipes
    • The Bark That’s Better With Every Bite – Peppermint Marble Bark

      Posted at 2:31 pm by StephMo
      Dec 12th

      Technically you can make a chocolate bark by melting chocolate and throwing whatever you like in it. While you may really like the taste of anchovies and crushed Kit Kats, I am thinking the recipients of your holiday bark may prefer something a little more mainstream and festive. Even though I have made many a different bark over the years, this peppermint marble bark is my go to favorite.

      I use Baker’s Semi-Sweet Chocolate and Baker’s White Chocolate if I can find it. Most stores don’t seem to carry the white chocolate, and if not I prefer to use Ghiradelli White Chocolate Chips. This recipe has a really great taste and I recommend sticking with the semi-sweet chocolate, and sticking with the Baker’s brand. You will need 1 package of each.

      Not only is this a great tasting and impressive looking bark, it allows you to get out some of your holiday frustrations. You will need a cup of crushed candy canes or peppermint starlight candies and the best way to crush them, is to smash them. I put a bunch in a plastic bag and have at them with a wooden mallet. Instant stress relief. And an instant mess if you use a thin plastic bag.

      Once you are done annihilating your mints, line a cookie sheet with wax paper. Microwave the semi-sweet and white chocolates in separate bowls. Start with a minute, stir the chocolate, and continue in 30 second intervals until melted. Be careful with the white chocolate because it can burn easily.

      Stir half of the crushed mints into each bowl of chocolate. Drop spoonfuls of each chocolate close to each other on the baking sheet and smooth the chocolate to the thickness you prefer. Once all the chocolate is laid out, use a knife to swirl the chocolates together to marbleize them.

      Refrigerate the bark until firm, and then just break into pieces. Store in an air tight container.

      Posted in Holiday Treats, Peppermint Marble Bark, Recipes, Sweet Treats | Tagged bark, bark recipe, blog, blogger, chocolate bark, food blog, holiday baking, marble bark, peppermint bark recipe, Recipes
    • Chocolate Dippin’ Pretzels

      Posted at 3:04 pm by StephMo
      Dec 11th

      It’s time to get dippin’, chocolate dippin’ that is! There is just something so good about the combination of salty and sweet that makes pretzels and chocolate the perfect match. I have been chocolate dipping pretzels at Christmas time for longer than I can remember. I know that doesn’t say much these days, but neighbors and friends have been receiving chocolate dipped treats from me for years and years. They are such and easy, impressive, and yummy treat to serve or give to others as a gift.

      Some years I use small twists, large twists, small rods, long rods, or a combination. I have dipped them in milk chocolate and drizzled melted white chocolate on top, and vice versa. I have used sprinkles, jimmies, mini chocolate chips, Christmas tree sprinkles, crushed candy canes, and probably other toppings as well. There are so many ways to make these pretzels that you can just be creative and do whatever you wish.

      If you can’t find real chocolate melting wafers, you can always find the bags of assorted flavors and colors of melting wafers at your local craft store. I find it is much easier to use these than it is to use chocolate chips or another kind of baking chocolate because they melt better. It also won’t harden as quickly giving you more time to work. If the chocolate in the bowl does start to harden, just pop it in the microwave for 20-30 seconds and it will loosen up.

      The tap, tap, tapping sound of the pretzel on the side of the bowl as you let the excess chocolate drip off becomes quite therapeutic, especially when you are on your 567th pretzel. Often times when you get a little too relaxed the pretzel will break which just means “seconds” for your family, which I can assure you they won’t mind.

      Lay each pretzel down gently on a wax paper covered cookie sheet. I usually dip a few and then add the toppings. Make sure to add whatever topping you choose before the chocolate sets. Once I have a cookie sheet full, I just put them in the refrigerator for a little while.

      They don’t need to be in there long before you can remove them and store them in an air tight container. My chocolate dipped goodies are usually the first item I make out of my holiday baking because they keep longer than cookies will.

      On years when I’m feeling a little crazy, I also dip other items such as Oreos or graham crackers. I have also dipped large marshmallows and stuck them onto the tip of candy cane sticks. So many possible dippers!

      So go get dippin’!

      Posted in Chocolate Dipped Pretzels, Holiday Treats, Sweet Treats | Tagged chocolate dipped, chocolate dipped oreos, chocolate dipped pretzels, dipped oreos, dipped pretzels, holiday treats, homemade treats
    • Not Every Italian Likes Anise, So Make Lemon Anginetti Cookies!

      Posted at 3:12 pm by StephMo
      Dec 9th

      Every year my mother along with many other Italians, make their Italian Anise Cookies around the holidays. They always looked so good, and I always wished I liked them. I really wanted to like them, and every few years I would try one to see if maybe my aversion to anise flavoring had dissipated. I do have some Italian blood in me so I should like them, right? Wrong. So years ago I decided to stop trying, and to find a similar looking Italian cookie without that awful anise taste.

      I tried a few different recipes before I found a fantastic recipe for Anginetti, or Italian Lemon Drop Cookies. I am not even sure where I found this recipe, but it has been a Christmas staple cookie every year since. The cookie itself has a very subtle lemon taste, and the icing looks like the regular white icing on the anise cookies, but has lemon extract. Yum.

      This dough gets very sticky, and I have found over the years that they look better if you roll the dough into balls in your hands as opposed to using a cookie scoop or dropping them by teaspoonfuls.

      Anginetti Recipe:

      1/2 cup sugar

      1/4 cup vegetable shortening

      3 large eggs

      1 1/2 tsps. lemon extract

      2 cups flour

      1 1/2 tsps. baking powder

      1/8 tsp. salt

      Preheat oven to 350 degrees. Cream together sugar and shortening. Add eggs and lemon extract and beat well. Add flour, baking powder, and salt. Mix well. Drop dough onto a slightly greased cookie sheet, spacing them about 2 inches apart. Bake for about 12-15 minutes, or until firm and lightly brown. Allow to cool completely on wire racks.

      Once the cookies are cooled, I prefer to dip the cookies upside down into the icing as opposed to frosting them. The cookies look nicer this way.

      Icing Recipe:

      3 cups confectioners sugar

      1/4 cup water

      1 tsp. lemon extract

      Combine all ingredients and mix until smooth. If too loose, add more confectioners sugar. If too stiff, add more water in tiny increments.

      Before the icing sets completely, I add some holiday sprinkles on top.

      Your fellow anise hating cookie lovers will thank you. #saynotoanise 😉

      Posted in Cookies, Holiday Treats, Lemon Anginetti Cookies | Tagged anginetti, anginetti recipe, cookie recipe, food blog, food blogger, holiday baking, holiday cookies, italian lemon cookie recipe, lemon drop cookies, Recipes
    • I’m Melting! Adorable Melted Snowmen Cookies

      Posted at 12:47 pm by StephMo
      Dec 6th

      These melting snowmen cookies bring instant smiles to children and adults. They actually make me giggle, but I am easily amused. I am not going to lie though, they are a pain in the neck to make, but the reaction you get from them is worth it. When you are about to make these cookies set yourself out a chunk of time, put on some music, and pour yourself a large cup of coffee because you are in it for the long haul. I’m exaggerating slightly, but they are time consuming.

      I found this recipe on-line years ago, but after many different attempts at making these I have settled on a slightly different version. If you look you on-line you will see that people do these all different ways. However, I think mine are the best 😉

      I know I have said before that I always make my cookies from scratch, but these are my one exception. If this recipe was the only cookie I was making I may be tempted to make a homemade sugar cookie, but I make so many different varieties around the holidays that I just cut corners on this one. They take so long to put together and they are more about the cuteness than about the taste anyway.

      So the first thing I do is cut open the roll of Pillsbury Sugar Cookie dough and bake the cookies. Once they are done they need to cool completely before decorating. The good thing about this recipe is that you can bake the cookies hours or even a day before and decorate them when you are ready.

      You will need a bag of large marshmallows for the heads. They look better if you cut off one end of the marshmallow. Since I hate to waste food, I usually munch on the ends that aren’t needed. Or you could save them and put them in hot chocolate? I prefer to just eat them.

      Once those are done you will need orange sprinkles long enough to be the carrot nose. If you can’t find just orange sprinkles, you will need to fish through a container of colored sprinkles which is what I typically end up doing. Even though I have seen multicolored carrots before, I haven’t yet gotten to the point where my snowmen have had purple and yellow noses. All you need to do is push the orange sprinkle into the marshmallow far enough until it stays.

      When I first tried making these cookies I used black decorator’s gel for the eyes and mouth. Personally I find that it is not only easier to use a food marker, but I think it looks better. By food marker I do not mean a Sharpie, they sell edible markers at craft stores. I like to make a circle for the mouth to give it a “oh no I’m melting” look. You could make a smiley face, but I’m pretty sure that snowmen would not be too happy about melting. Frosty never seemed to be anyway.

      Now it’s time to make the melting snow. The first year I made these cookies I used a store bought icing. The next year I purchased a different icing that didn’t work well, and instead of running out to the store I decided to just make my own icing instead. That is what I have continued to do since then.

      Icing Recipe:

      Mix together 1 cup of confectioners sugar and 2 tsps. milk until smooth. Beat in 2 tsps. of corn syrup until it looks smooth and glossy. If it is too thick, add a little more corn syrup.

      I use a spoon to drop some icing onto one side of the cookie, and then tilt the cookie while turning it so that it looks like melted snow. I also like to let a little run off of the sides. Make sure to stick on the marshmallow heads before the icing sets, the icing acts as a glue to hold the heads in place. Make sure the icing really sets before you finish decorating.

      Originally I also tried using black gel for the arms but had difficulty with those as well, and decided to just use the food markers. I am not really sure why I seem to have so much difficulty with such things, maybe it’s just me. If you are more skilled than I am with decorator’s frosting or gel, you may decide to use that instead. If you decide to use the food markers, you have to use a very light touch because it cracks through the icing.

      The last step is using gel to make a scarf. Then let the smiles and giggles begin!

      Posted in Cookies, Holiday Treats, Melted Snowmen Cookies | Tagged blog, blogger, cookie recipe, food blog, food blogger, holiday cookies, melting snowmen cookie recipe, melting snowmen cookies, Recipes, snowman cookie, snowmen cookies
    ← Older posts
    • Categories

      • Blog Posts
        • Alpaca Trek
        • Boston's Swan Boats
        • Candle Making
        • DIY Crayon Candle Making Craft
        • DIY Sea Shell Shadow Boxes
        • Jammie Day in Boothbay Harbor, ME
        • Mason Jar Snow Globes
        • My Mom's Recipes❤️
        • Photography
          • Eagles
          • Owls
          • Wood Ducks
        • Repurposed Cobbler's Rack
        • Restaurants
          • Katz's Bagels
          • Parker's Maple Barn
          • Pizzeria Regina
        • Tulip Picking
      • Cocktails
        • Apple Cider Bourbon
        • Chocolate Raspberry Martini
        • Cosmopolitan Martini
        • Espresso Martini
        • French Vanilla Martini
        • Lemon Blueberry Martini
        • Lemon Raspberry Martini
        • Peanut Butter and Jelly Cocktail
        • Pumpkin Pie Martini
        • S'Mores Martini
        • Taste of Summer
      • Comfort Food
      • Poems
      • Recipes
        • Appetizers
          • Bacon Wrapped Scallops
          • Broccoli Christmas Tree
          • Chinese Stuffed Buns
          • Easy Nachos
          • Guacamole
          • Potato Chips
          • Sausage Wontons
          • Spinach and Cheese Arancini
          • Truffle Parmesan Popcorn
        • Breads
          • Apple Bread
          • Blueberry Scones with Lemon Icing
          • Brioche Bread Pudding
          • Cheesy Garlic Bread
          • Chocolate Chip Banana Bread
          • Chocolate Chip Pumpkin Bread
          • Chocolate Zucchini Bread
          • Cinnamon Rolls
          • Coffee Cake
          • French Bread
          • Irish Soda Bread
          • Italian Cold Cut Calzone
          • Mocha Chip Scones
          • Popovers for Piglet
          • Scones
          • Strawberry Shortcake
          • Tortillas
          • Zucchini Bread
        • Brunch
          • Baked French Toast
          • Biscuits and Sausage Gravy
          • Cheesy Grits
          • Chocolate Waffles
          • Crustless Quiche
          • Gingerbread Pancakes
          • Oatmeal Bowls
          • Pumpkin Pancakes
          • Waffles
        • Cakes
          • Carrot Cake with Cream Cheese Frosting
            • Boston Cream Pie
          • Chocolate Buttercream Frosting
          • Chocolate Cake
          • Chocolate Chip Cake
          • Chocolate Chip Cheesecake
          • Chocolate Mint Cupcakes
          • Coconut Raspberry Layer Cake
          • Fruit Cake
          • Hot Fudge Pudding Cake
          • Hummingbird Cake
          • Lemon Cake with Lemon Buttercream Frosting
          • Pineapple Upside Down Cake
          • Pumpkin Roll
          • Pumpkin Whoopie Pies
          • Ricotta Cheesecake
          • Robin's Nest Cake
          • S'Mores Cupcakes
          • Vanilla Buttercream Frosting
        • Cookies
          • Amazing Brownies
          • Candy Cane Cookies
          • Chocolate Chip Cookies
          • Chocolate Covered Oreos
          • Chocolate Dipped Peppermint Shortbread Cookies
          • Coconut Macaroons
          • Italian Seed Cookies
          • Kitchen Sink Cookies
          • Koulourakia
          • Lemon Anginetti Cookies
          • M&M Brownie Cookies
          • M&M cookies
          • Melted Snowmen Cookies
          • Pizzelles
          • Shortbread Jam Sandwich Cookie
          • Soft Snickerdoodles
          • Sprinkle Blondie Bars
          • Strawberry Oat Bars
          • Sugar Cookies
        • Dessert
          • Baked Rice Pudding
          • Betty Crocker Rice Pudding
          • Candied Fruit (Tanghulu)
          • Indian Pudding
          • Tiramisu
        • Dinners
          • Baked Pork and Apples
          • Bolognese
          • Buffalo Chicken Mac and Cheese
          • Buffalo Chicken Pot Pie
          • Chicken Croquettes
          • Chicken Cutlet Parmesan
          • Chicken Fried Rice
          • Chicken Parmesan
          • Chicken Piccata
          • Chicken Pot Pie
          • Chili and Cornbread
          • Dijon Baked Halibut
          • Fish Cakes
          • Fish Tacos
          • Homemade Pasta
          • Homemade Pizza
          • Lasagna
          • Lemon Arugula Pasta
          • Macaroni and Cheese
          • Meatballs
          • Meatloaf
          • Mexican Taco Pasta
          • Mustard Chicken Salad
          • Oven Fried Chicken and Waffles
          • Prosciutto Lamb Burgers
          • Pulled Pork
          • Spinach Sausage Strata
          • Turkey Pork Meatloaf
          • Turkey Zucchini Rice
        • Dips
          • Hummus
        • Holiday Treats
          • Brownie Trees
          • Chocolate Dipped Pretzels
          • Easter Bird's Nest Cupcakes
          • Halloween Treats
          • Matzah Toffee Crack
          • Peppermint Marble Bark
        • Jams
          • Strawberry Jam
        • Muffins
          • Blueberry Muffins
          • Chocolate Chip Muffins
          • Coffee Cake Muffins
          • Morning Glory Muffins
        • Pies
          • Apple Crisp
          • Apple Pie
          • Blueberry Pie
          • Chocolate Chip Pie
          • Coconut Custard Pie
          • Key Lime Pie
          • Pumpkin Pie
          • S'Mores Pie
          • Strawberry Rhubarb Pie
          • Vodka Pie Crust
        • Salads
          • Cauliflower Salad
          • Chicken Salad
          • Kale Quinoa Salad
        • Sauces
          • Italian Red Sauce
          • Lemon Tahini Dressing
          • Pesto
          • Pesto Cream Sauce
        • Side Dishes
          • Mexican Street Corn
          • Potato Latkes
          • Ratatouille
        • Soup
          • Avgolemono (Greek Lemon Soup)
          • Buffalo Chicken Soup
          • Creamy Chicken Noodle Soup
          • Italian Wedding Soup
          • Lamb Bourguignon
          • New England Fish and Corn Chowder
        • Sweet Treats
          • Chocolate Clusters
          • Cocoa Bombs
      • Uncategorized

Powered by WordPress.com.

Stephanie's Slice Of Life
Proudly powered by WordPress Theme: Handmade.
 

Loading Comments...